user-manual
This machine belongs to University of Neuchâtel. The manager of the machine is Toralf Scharf. He should be contacted for any special requests concerning new recipes, new substrate materials introduced in the chamber or anything else which is not standard.
Check the service area
- Water cooling: T = 19°C – 20°C , if T > 20°C, there is a problem. Call staff.

Chamber cleaning
A cleaning of the chamber with a CF4+O2 plasma is required after each 10µm of deposited material.
It is to the user to check the log book of the machine and if necessary launch a cleaning recipe of 2x (40min high pressure + 40min low pressure) CF4+O2 plasma.
Make a deposition
- How to start the software:
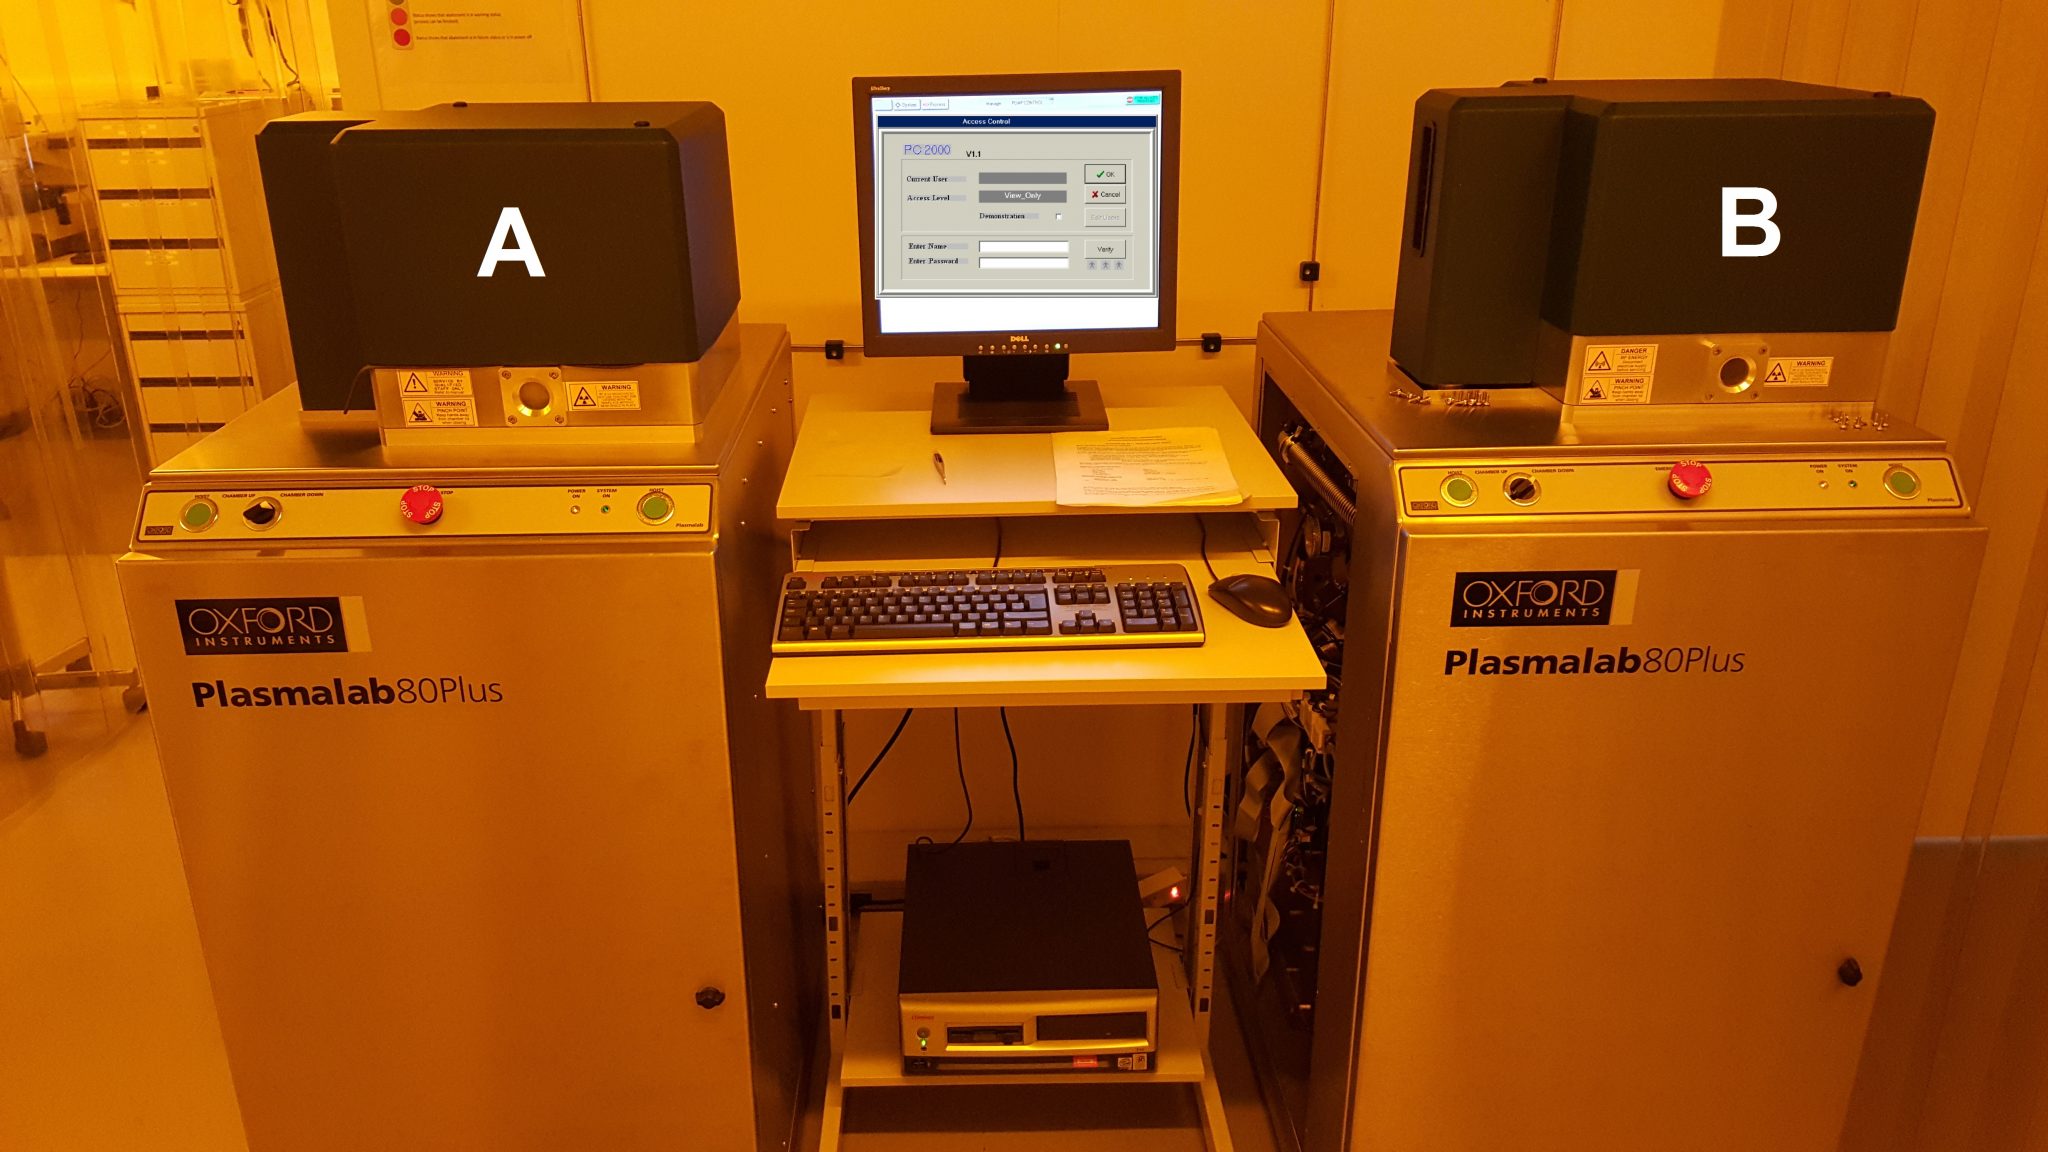
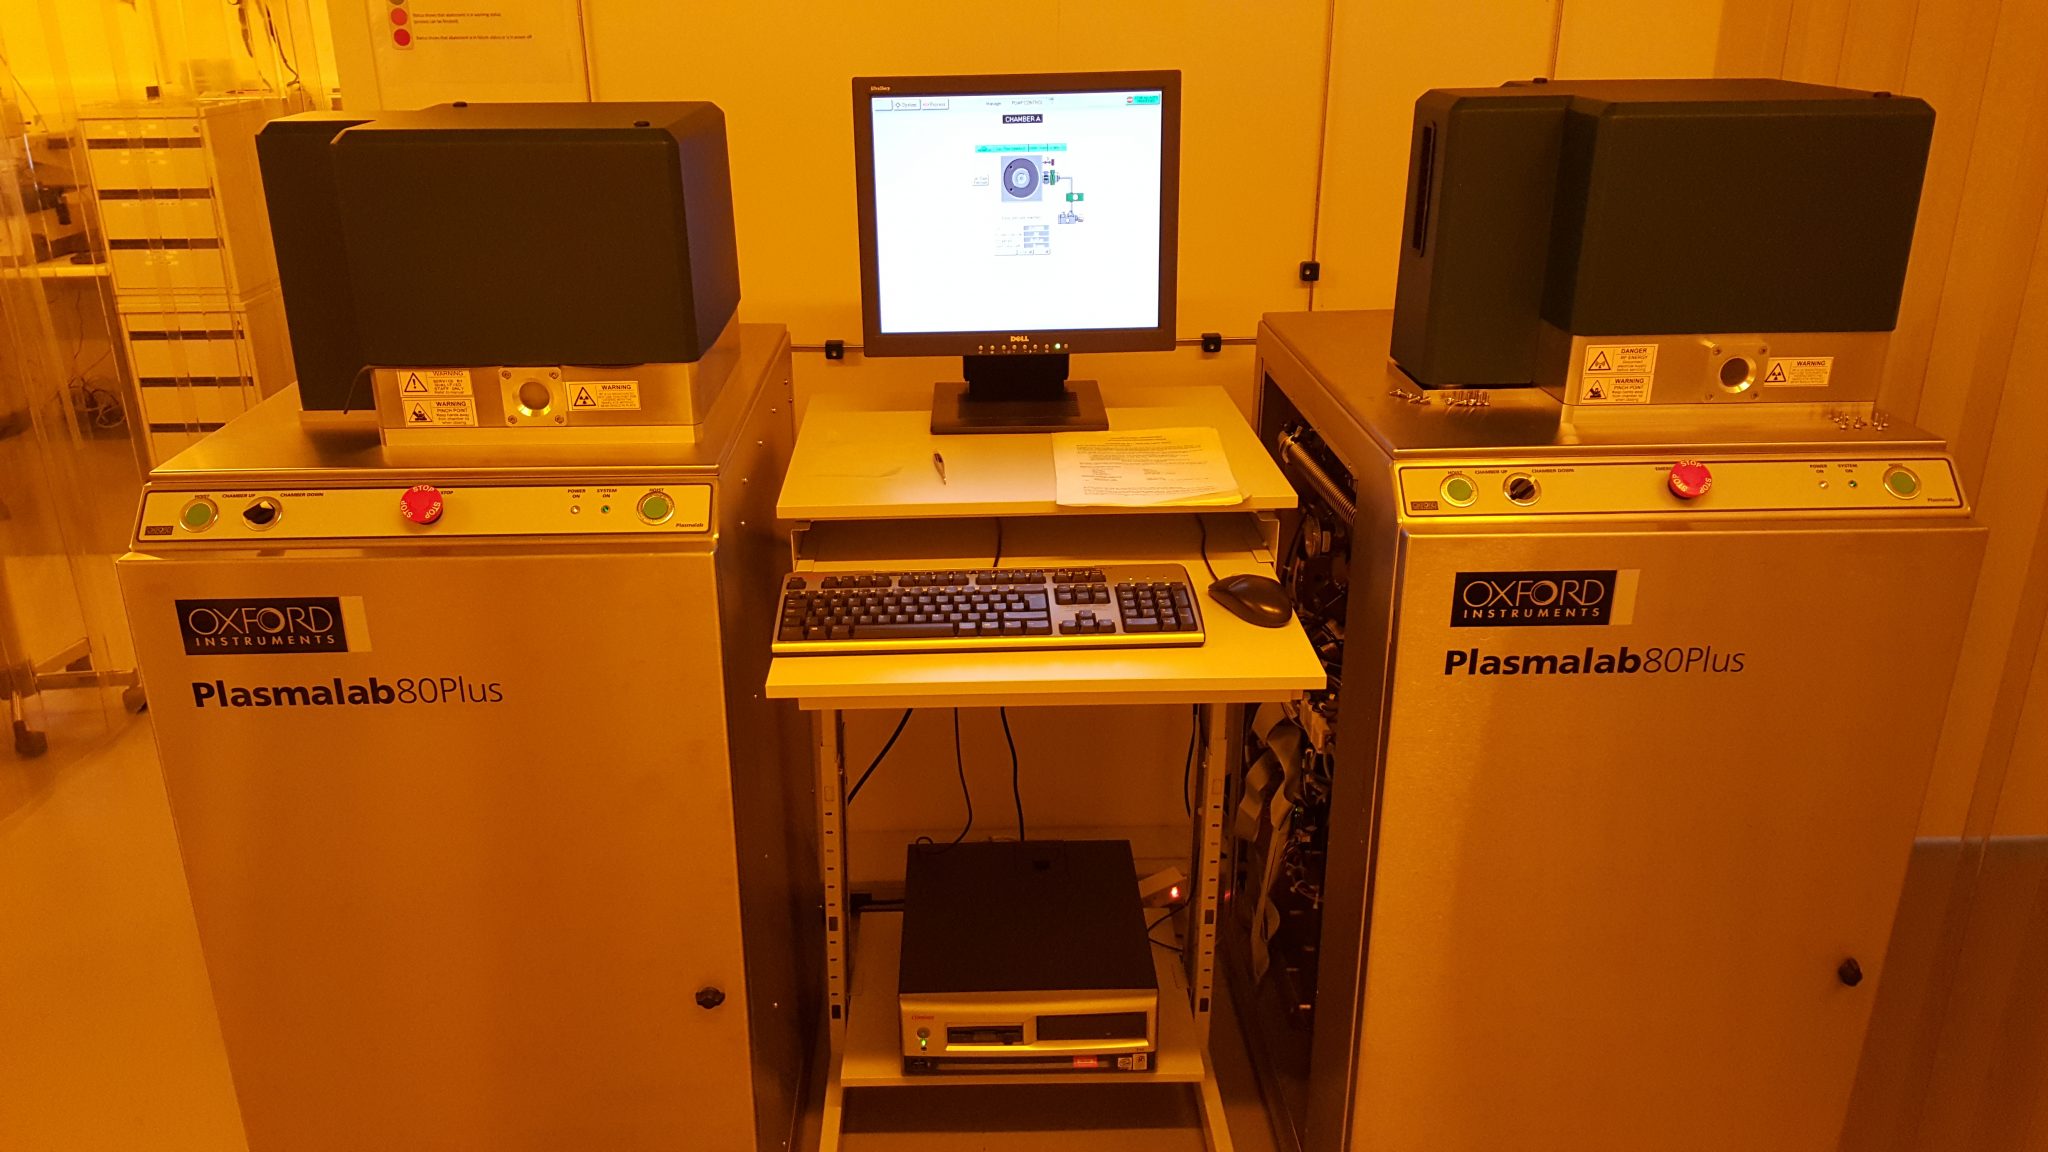
In the picture above, on the left is the PECVD Master chamber (A) and on the right the RIE Slave chamber (B).
- On the desktop of the computer, there are two icons representing a letter A and a letter B. Double click on A or B depending which chamber you want to use
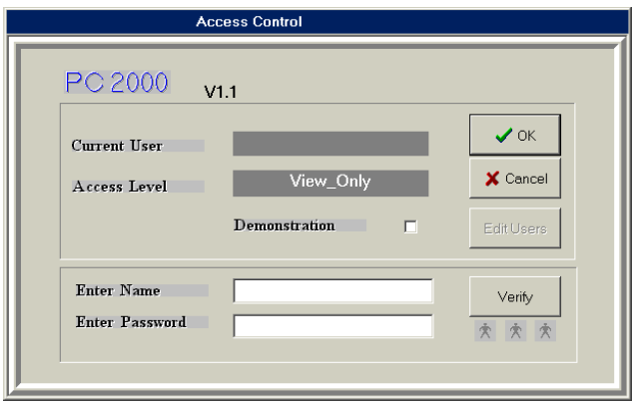
- Start the software by double clicking on the PC2000 icon which is on the desktop as well
- Enter your credidentials:
- Switch ON the vacuum pumps:
- Go to the pumping system panel (System>Pumping)
- Click on the picture of the rotary vane pump to switch ON the pumping system and the press EVACUATE.
- Wait until the base pressure of 10mTorr is reached.
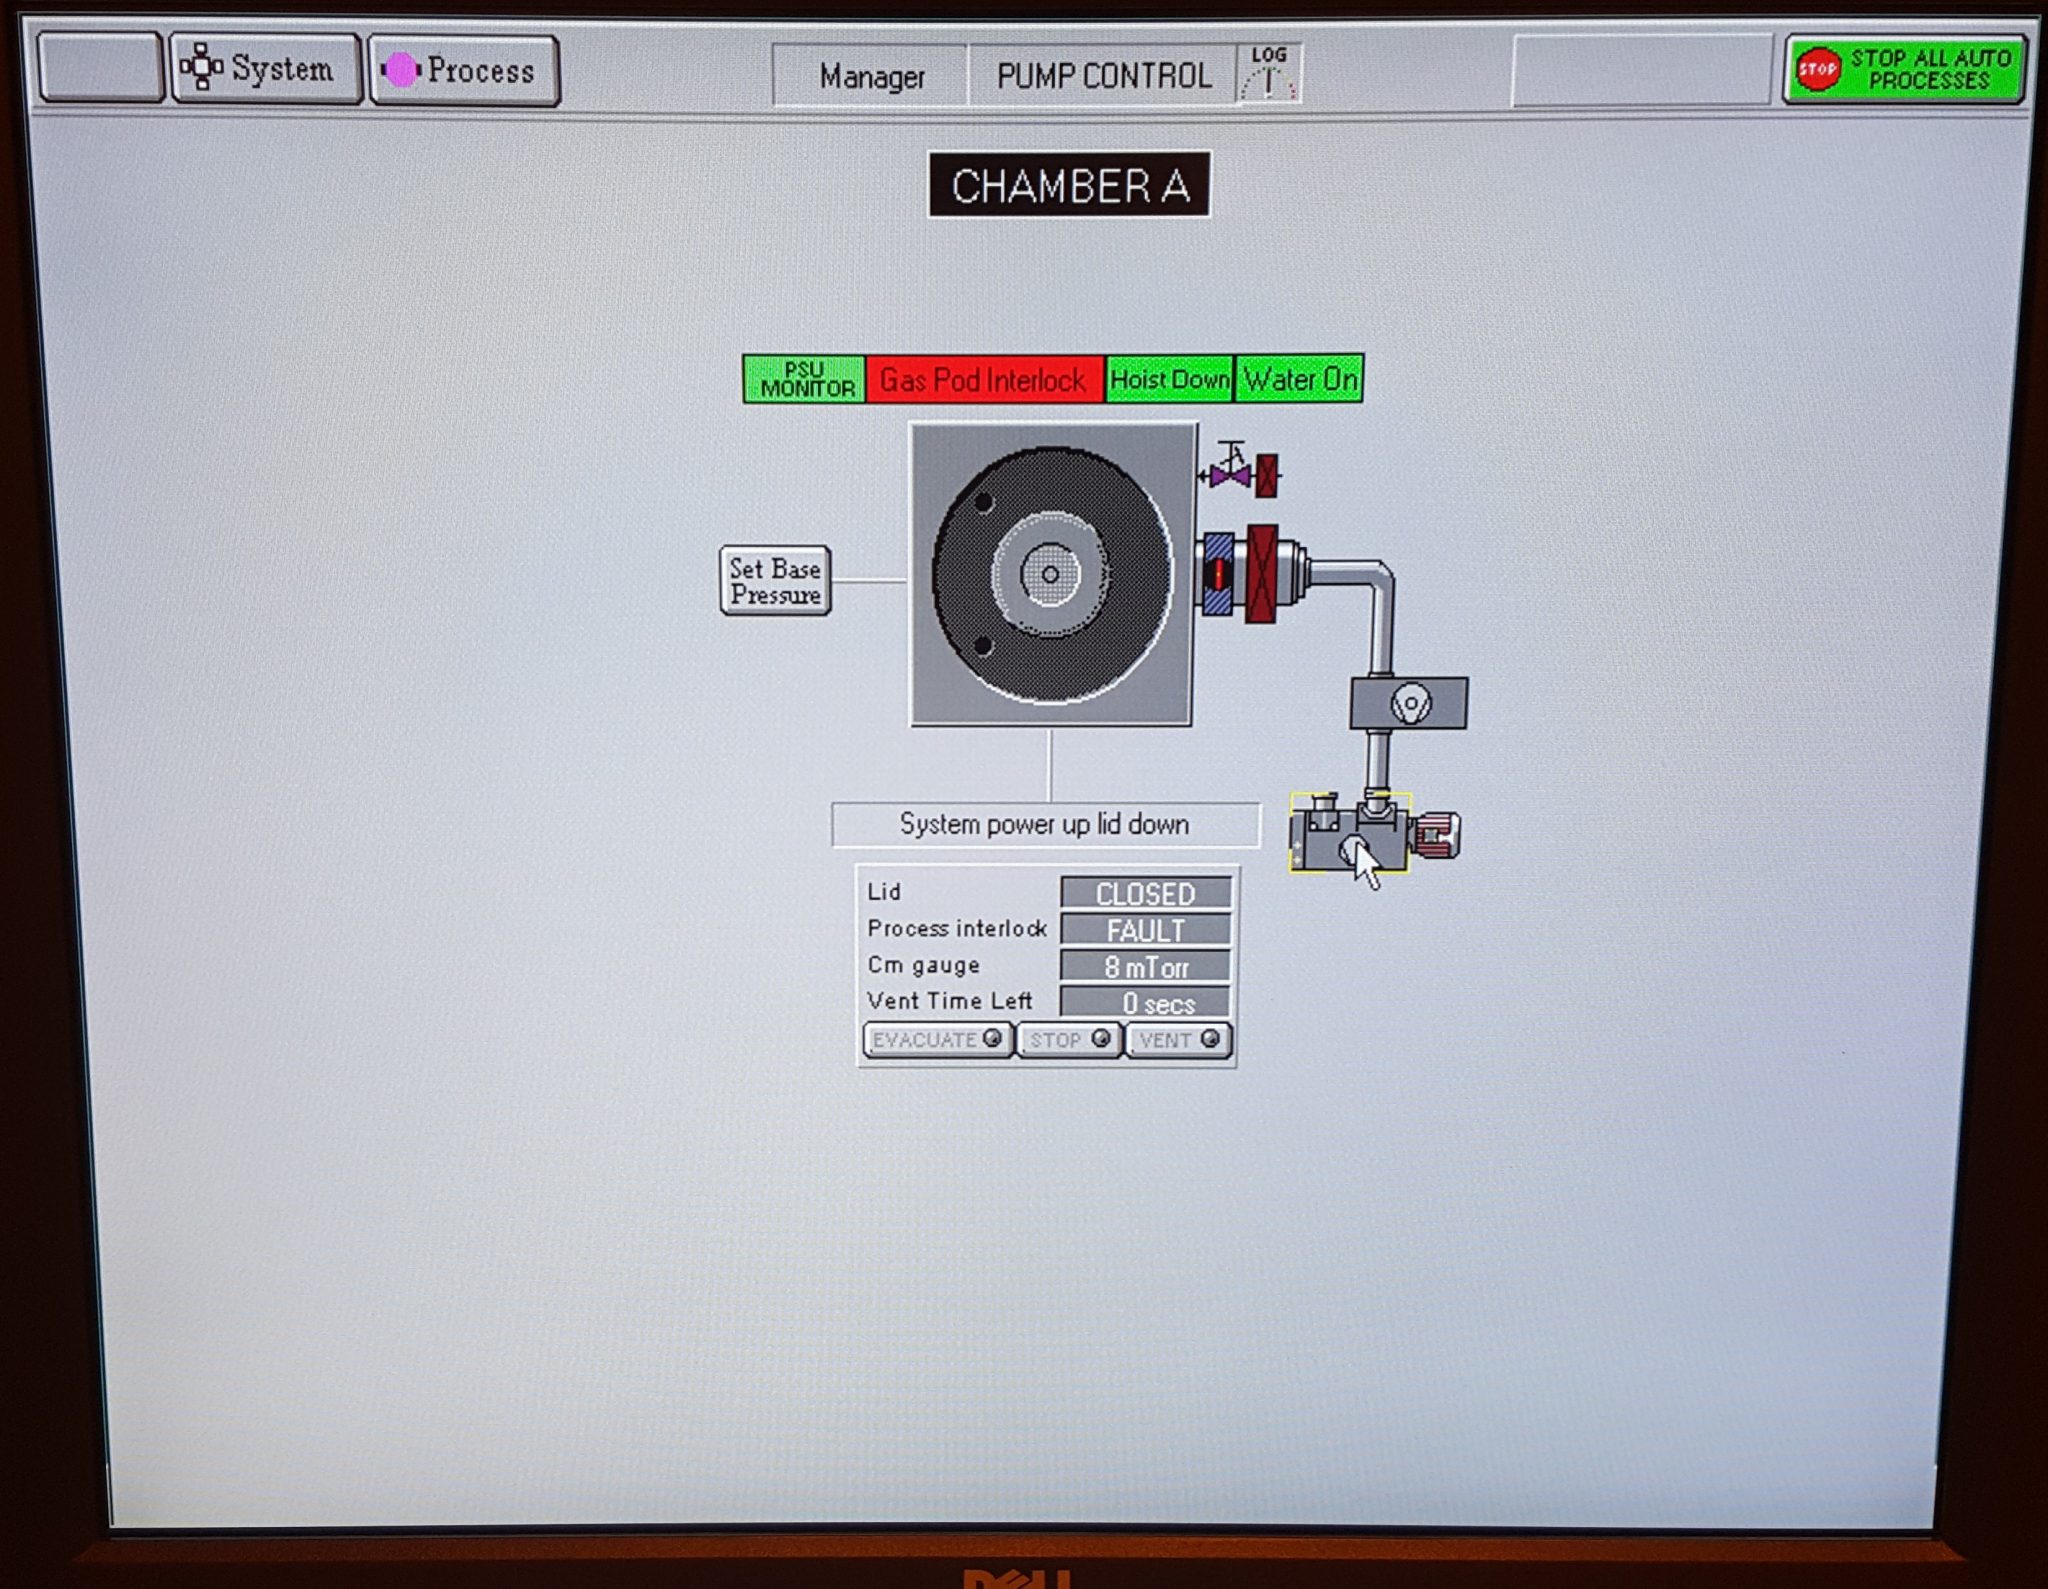
- Load a sample in the chamber:
- In the pumping panel click on STOP, wait 5 secondes, and click on VENT
- The venting procedure takes 200 secondes. Wait.
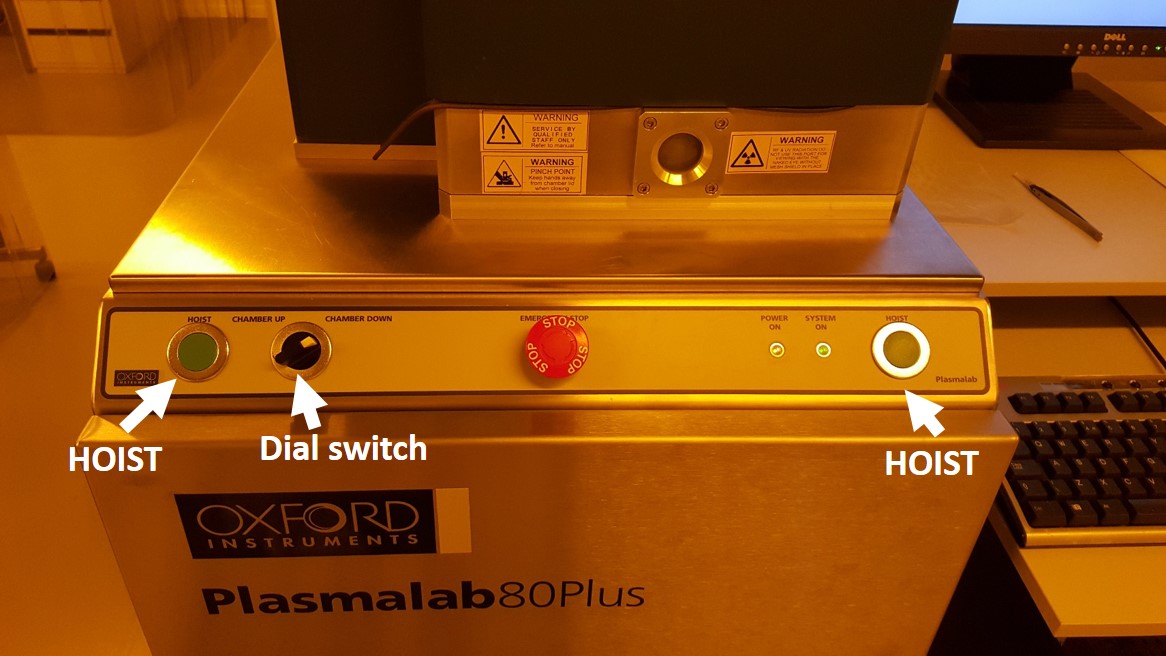
- Once the chamber is at atmosphere pressure, open the hoist.
First turn the dial switch on “Chamber up” then press the two “Hoist” button simultaneously - Deposit your sampler on the ceramic chuck using only the Polyphenylene Sulfide plastic tweezers or ceramic tweezers which can sustain temperatures up to 300°C. No metalic tweezers! The deposition homogeneity is better in the center of the chuck.
- Close the chamber by turning the Dial Switch to “chambr down” and press the two “Hoist” button simultaneously.
- In the System>Pumping panel click on “EVACUATE” to pump down the chamber to the base press
Allowed samples material: SiO2, Si3N4, Si, GaAs, InP. For other materials, please contact the manager.
- How to use a recipe
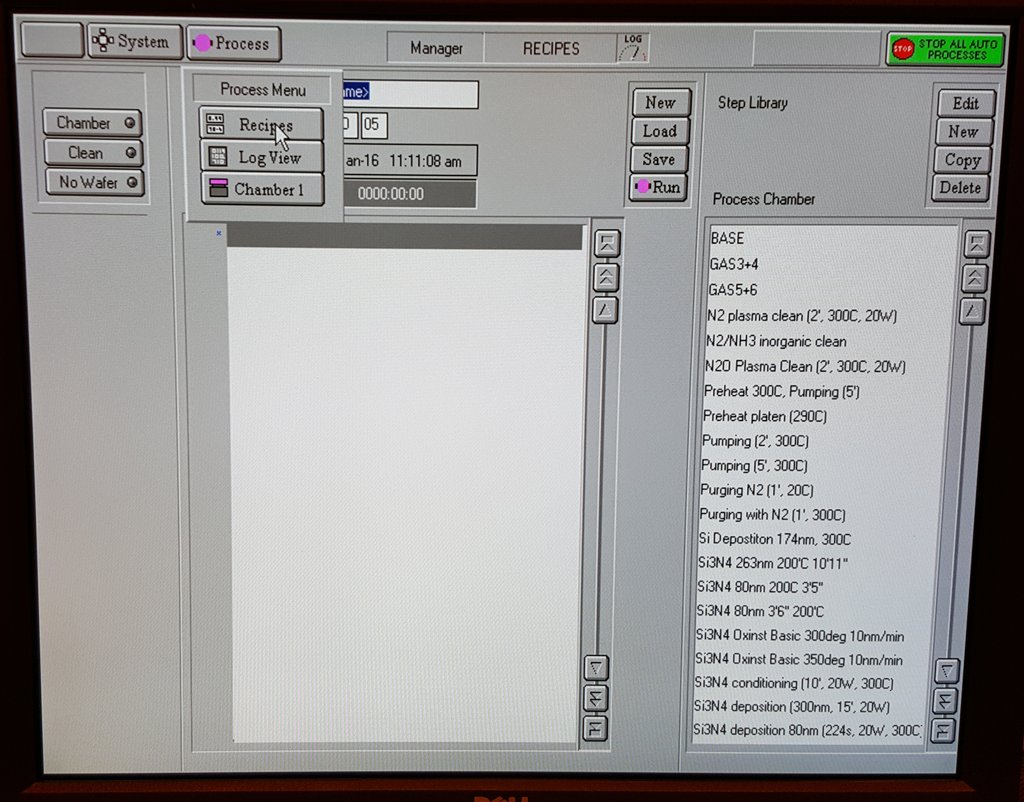
- In the software go to Process>Recipes
This panel is to prepare and run recipes. It is divided in two columns. #1 is the recipes column. #2 is the Step library column.
A recipe is made out of different steps form the step library which are well characterized. - Click on “Load” and choose the recipe you want to use.
- Make modifications of your recipe (e.g. process time)
- Click on “Run” to start the deposition
- For PECVD the ceramic chuck temperature is always set between 250°C to 400°C during deposition. The pre-heating of the chuck takes between 30 to 45 min. You should anticipate this by running a recipe called “Preheat to 300°C” for example. When you run it, an critical alarm pop-up should show up. This is normal. It shows up because you did not switched the scubber ON (see next bullet). Accept the alarm and verify that the set point of the heat controller is set to the temperature you want.
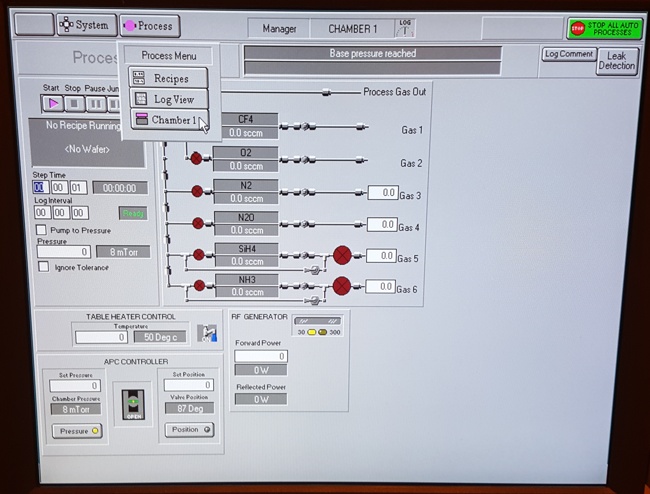
- All parameters of the chamber are shown in the Process>Chamber 1 (or 2) panel.
You can see the chuck temperature, the pressure, the RF power, the gas flows in sccm, and more generaly the live state of the machine.
Notes: When using a claning recipe, no pumping of the chamber can be done. You should enter a value of 0.1sccm of O2 to be able to pump the chamber without an alarm. This comes from the scubber interlock loop.