Where should I put the document?
For the machine, there are two ways to read documents:
- The window
To place the document on the scanner window, you have to open the lid. Therefore, you’ll find a handle just above the printer screen. Please place your document on the top left corner, near the red arrow, so that the machine can read it correctly. Marks on the sides helps you to estimate the size of the document. This is helpful when the machine asks you the format, which happens if the document hasn’t an Ax format or if the machine can’t detect it.
- The document compartment
Place the documents in the compartment to scan and copy both sides of the sheet. The printer confirm that it has detected the document to copy by a green light just above, and by placing the compartment at the correct height. If the document isn’t detected, just push it right to the bottom of the compartment, so that the sensors can detect its presence.
Photocopies
To photocopy a document, you first have to connect with your Camipro card, so that the accounting system can calculate the amount to subtract. You can find the « Copy » icon in the printer main menu as well as in the side menu.
Summary of copy options
- Buttons in the blue rectangle:
- – « Reproduction rate : Allows to make a document larger or smaller depending on various paper format.
- – « Choose paper : Allows to choose the compartment and the paper format for this copy.
- – « Check settings: Allows to have a global view of the selected settings.
- Finishing:
Choose this menu if you want to sort out a multi-page document sequentially (Pages ABC, ABC, ABC, etc.) or grouped (All pages A, then all pages B, etc.). You can also choose if you want the first page at the top or the bottom of the paper column.
- Recto verso (double sided)
With this menu you can choose if you want one or two sided documents, or other configurations. In the right tab you can also choose on which side should the document turn over.
- Density
With this menu you can lighten or darken the document. You can also set separately the density of the background, and so avoid problems with an original document that have dark paper.
- Original type
This menu informs the machine about the type of the document to copy. Indeed, the scanner sensibility changes depending on the original type.
- ID card copy
With this function, you can easily have a double sided copy of your ID card. Just follow the instructions on the screen.
The « Options » button on the bottom right corner provides a large choice of printing options.
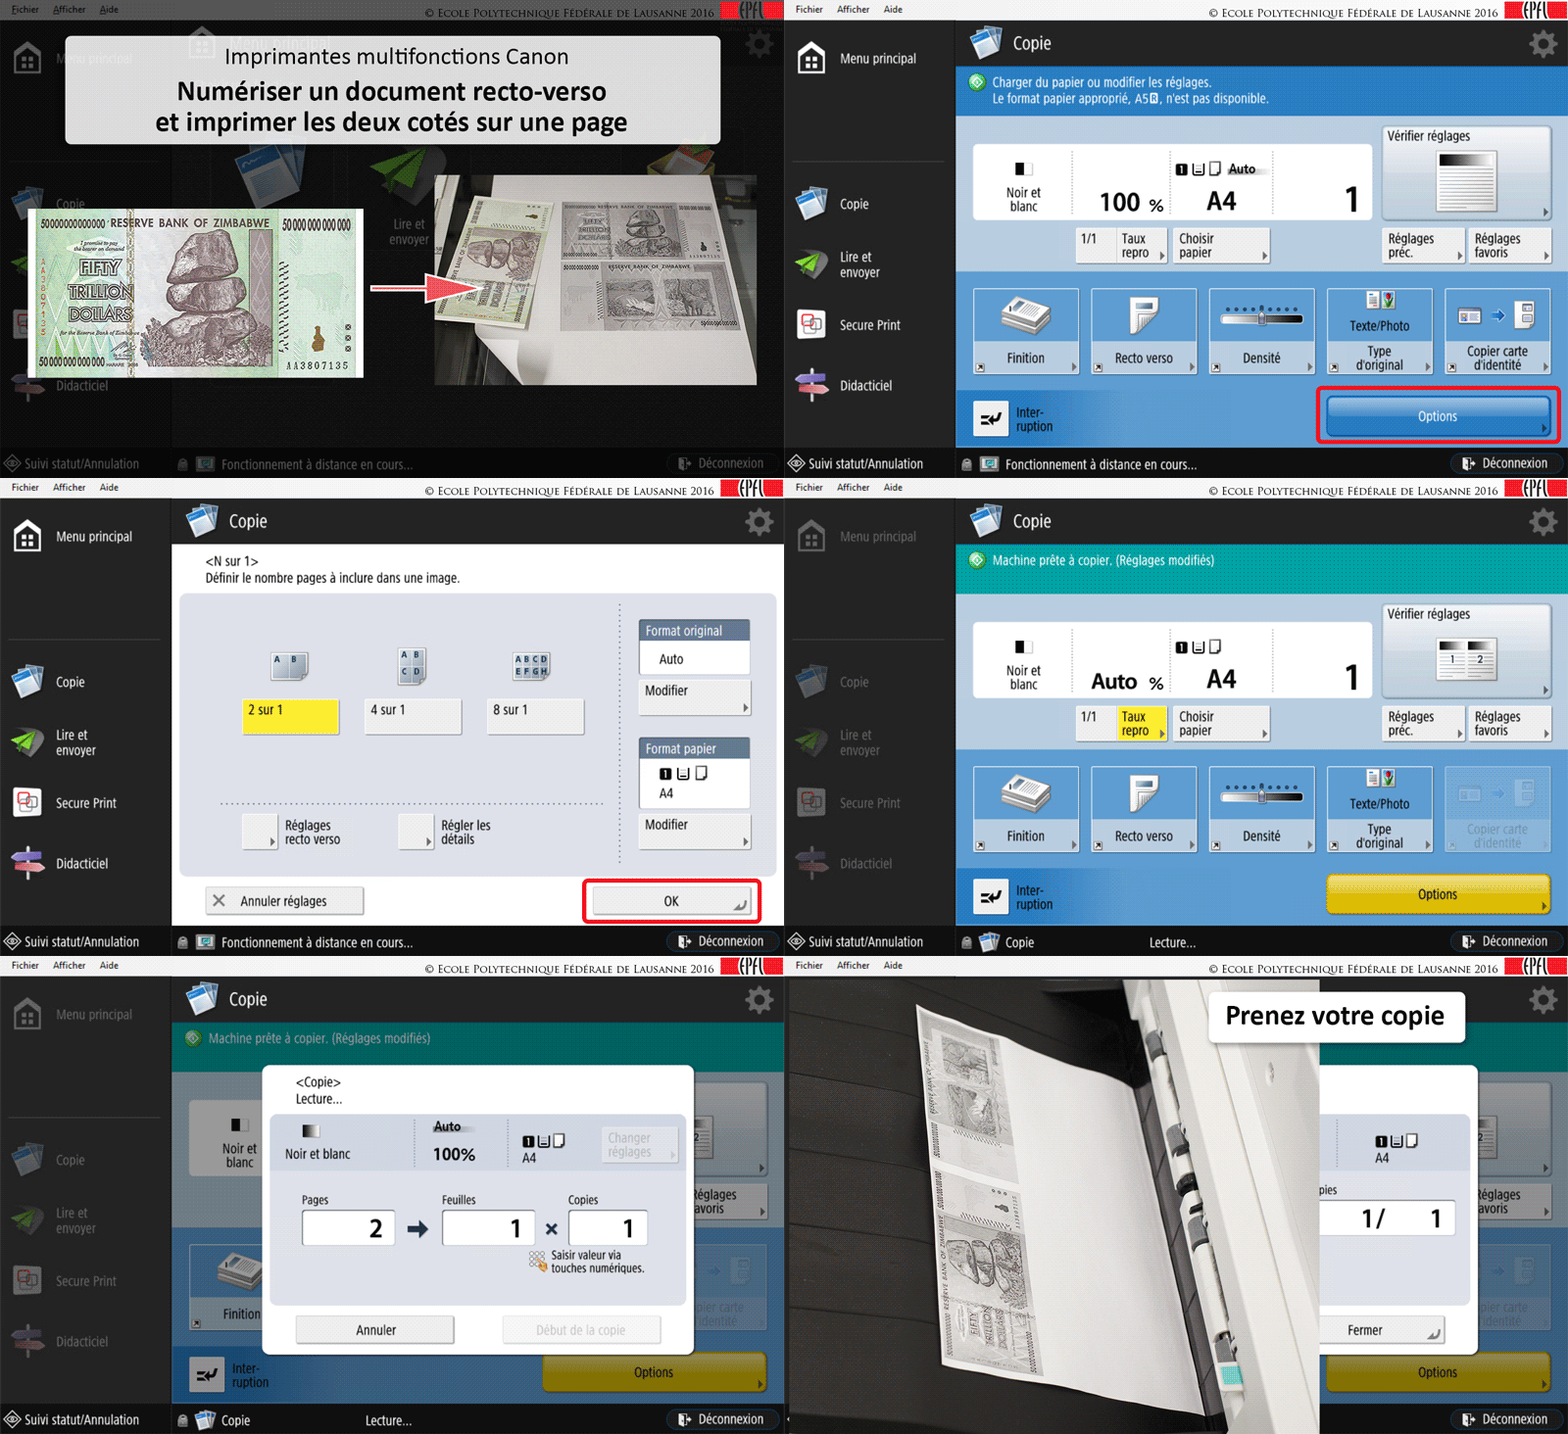
GIF tutorial : copying a double-sided document on a single page (french)

Scans
Canon multifunctionnal printers allow to scan documents and to send them by email.
Once you are connected, choose « Read and send » in the main menu.
On the left part of the screen you’ll find settings about the reciever(s). You can send your document to several people, you can also send a ‘certified copy’ to several receivers.
On the right, other settings. Most of them are available from the ‘Options’ button. There are two options pages, you can navigate between them with the arrows one the bottom right corner. The first page offers the scan settings (quality, recto/verso, …), the second page lets you modify the e-mail (objet, message, name of the linked file).
To validate the scan, press the green button. The machine will beep once the job is completed.
Options summary:
Choose the recievers:
- Address book
Allows to search for an EPFL email address, among the list.
For example, if you are looking for roger.federer@epfl.ch, you can write « roger », « roger.federer », « federer », » *fed* « . Indeed, the star symbol (*) acts like a wild card. For example the research ‘federer*’ will list all addresses beginnig with ‘federer’. The research ‘*federer*’ will list all addresses containing ‘federer’.
- « 1 touche »
This feature helps you to create shortcuts, that will be accessible to all users. Please use this only if needed.
- New reciever
If you want to add an address by hand, especially if the address is out of EPFL, for example : roger.federer@gmail.com
- Send it to me
Adds automatically the user’s email address in the recievers list. The address is encrypted, so you’ll only see a complicated code and won’t recognise your address. Don’t worry, the message will arrive in your inbox.
- Specify recievers
This button displays or masks the pannel that allows to add recievers.
- Cc /Bcc
This button adds recievers in the Conform Copy or Blind Carbon Copy mode, as for any normal email.
Set the scan up:
- Colors setup
To choose the color mode for scanning (By default the scan is in « automatic » mode).
- Resolution
To set the resolution level up. The higher the resolution, the better the precision, but also the heavier the file. We recommand you 300×300 dpi (dot per inch), which corresponds to most of the printed documents nowadays.
- Input format
Informs the printer about the document format. By default the modes is « automatic » and the machine searches itself.
- Output format
Here it is possible to choose the output format (.jpg, .pdf, .tiff, .xps, etc.). For PDF files, it is possible to activate the Optical Character Recognition (OCR). This function allows to copy-paste a text directly from the opened file in a computer (Warning: it works only for good quality printed documents).
- Details about the input
Inform here the machine about details such as on which side should the document flip (on double sided mode). You have also the possibility to scan different documents and group them.
Set the e-mail
To add an object or a message, or rename the linked file, you need to go on the ‘Options’ button, then tap the down arrow at the bottom right corner of the screen. All the e-mail settings will be displayed.
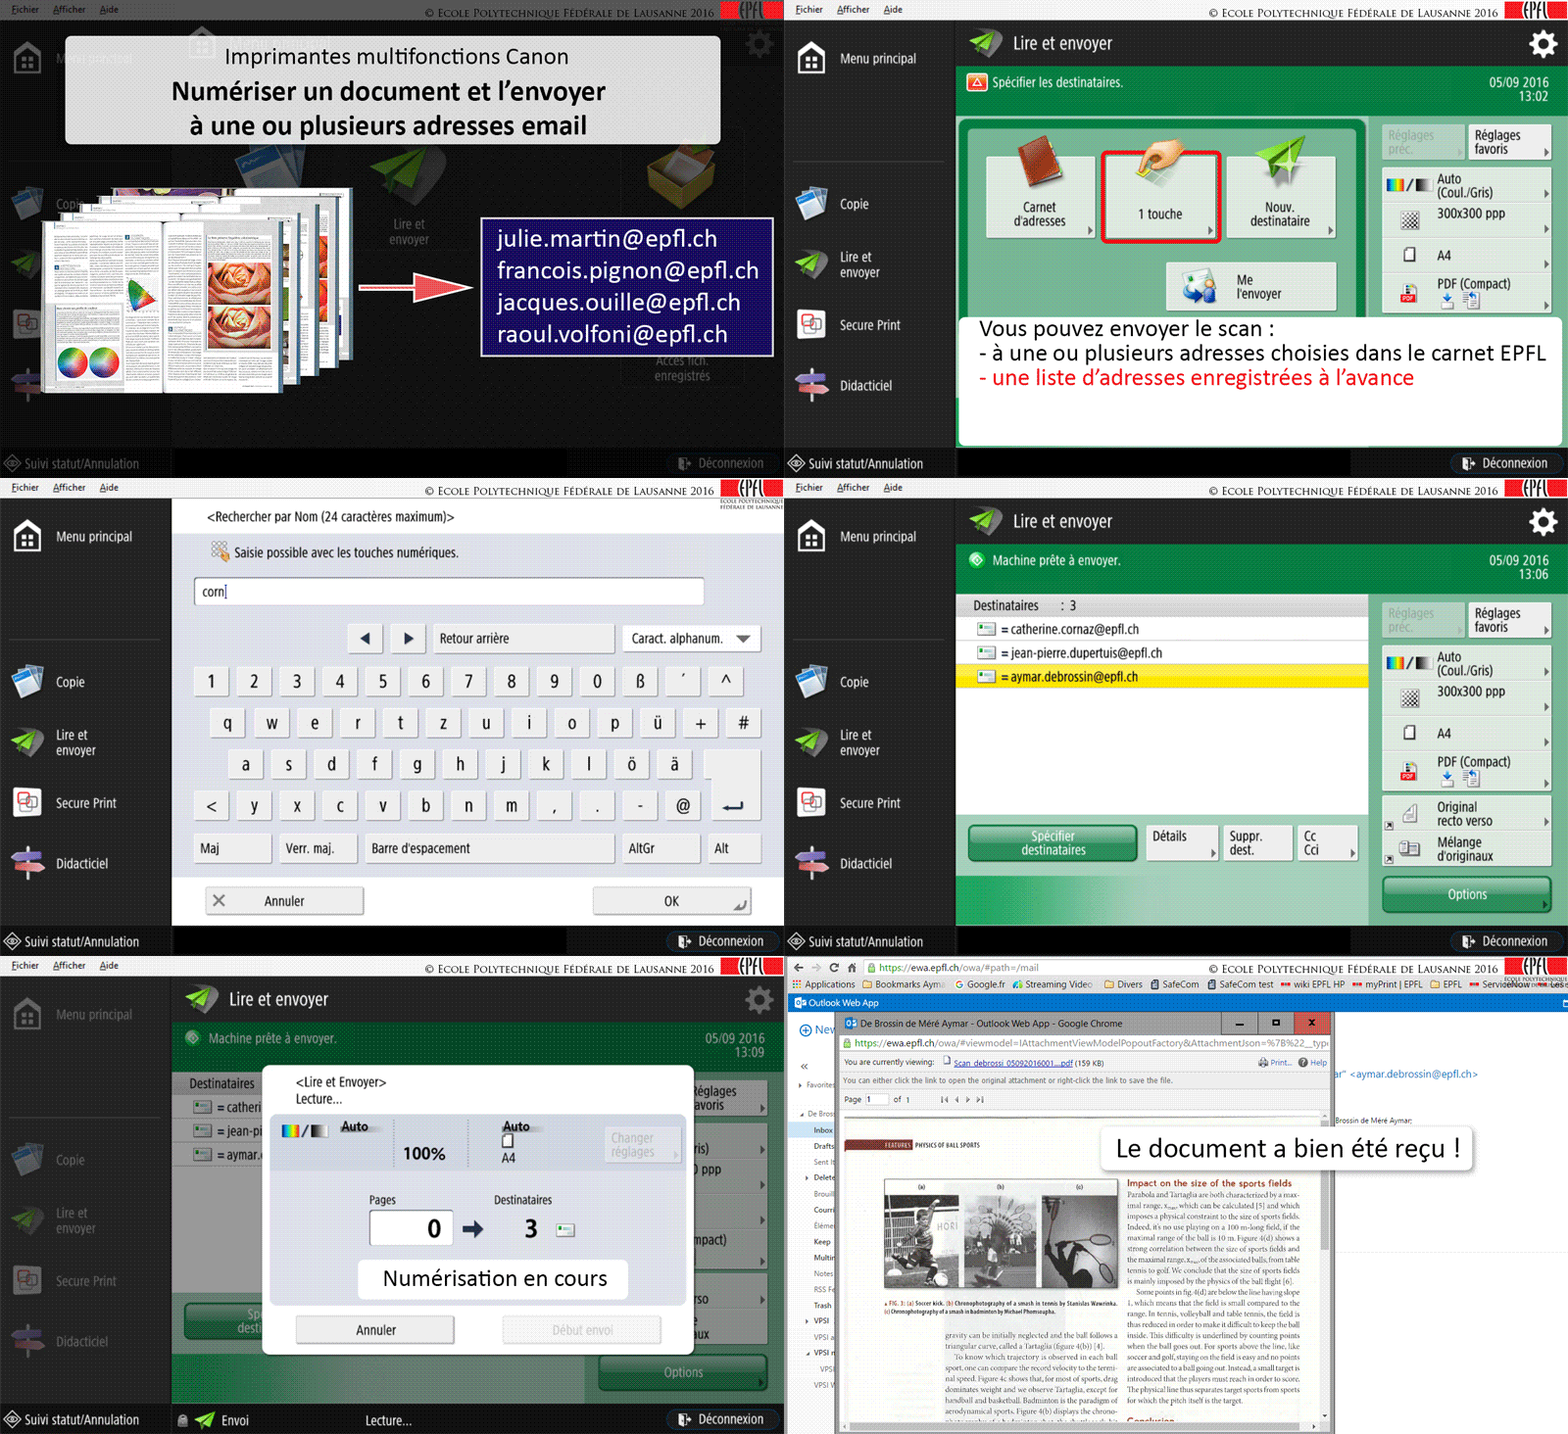
GIF tutorial : scan and send by e-mail (french)

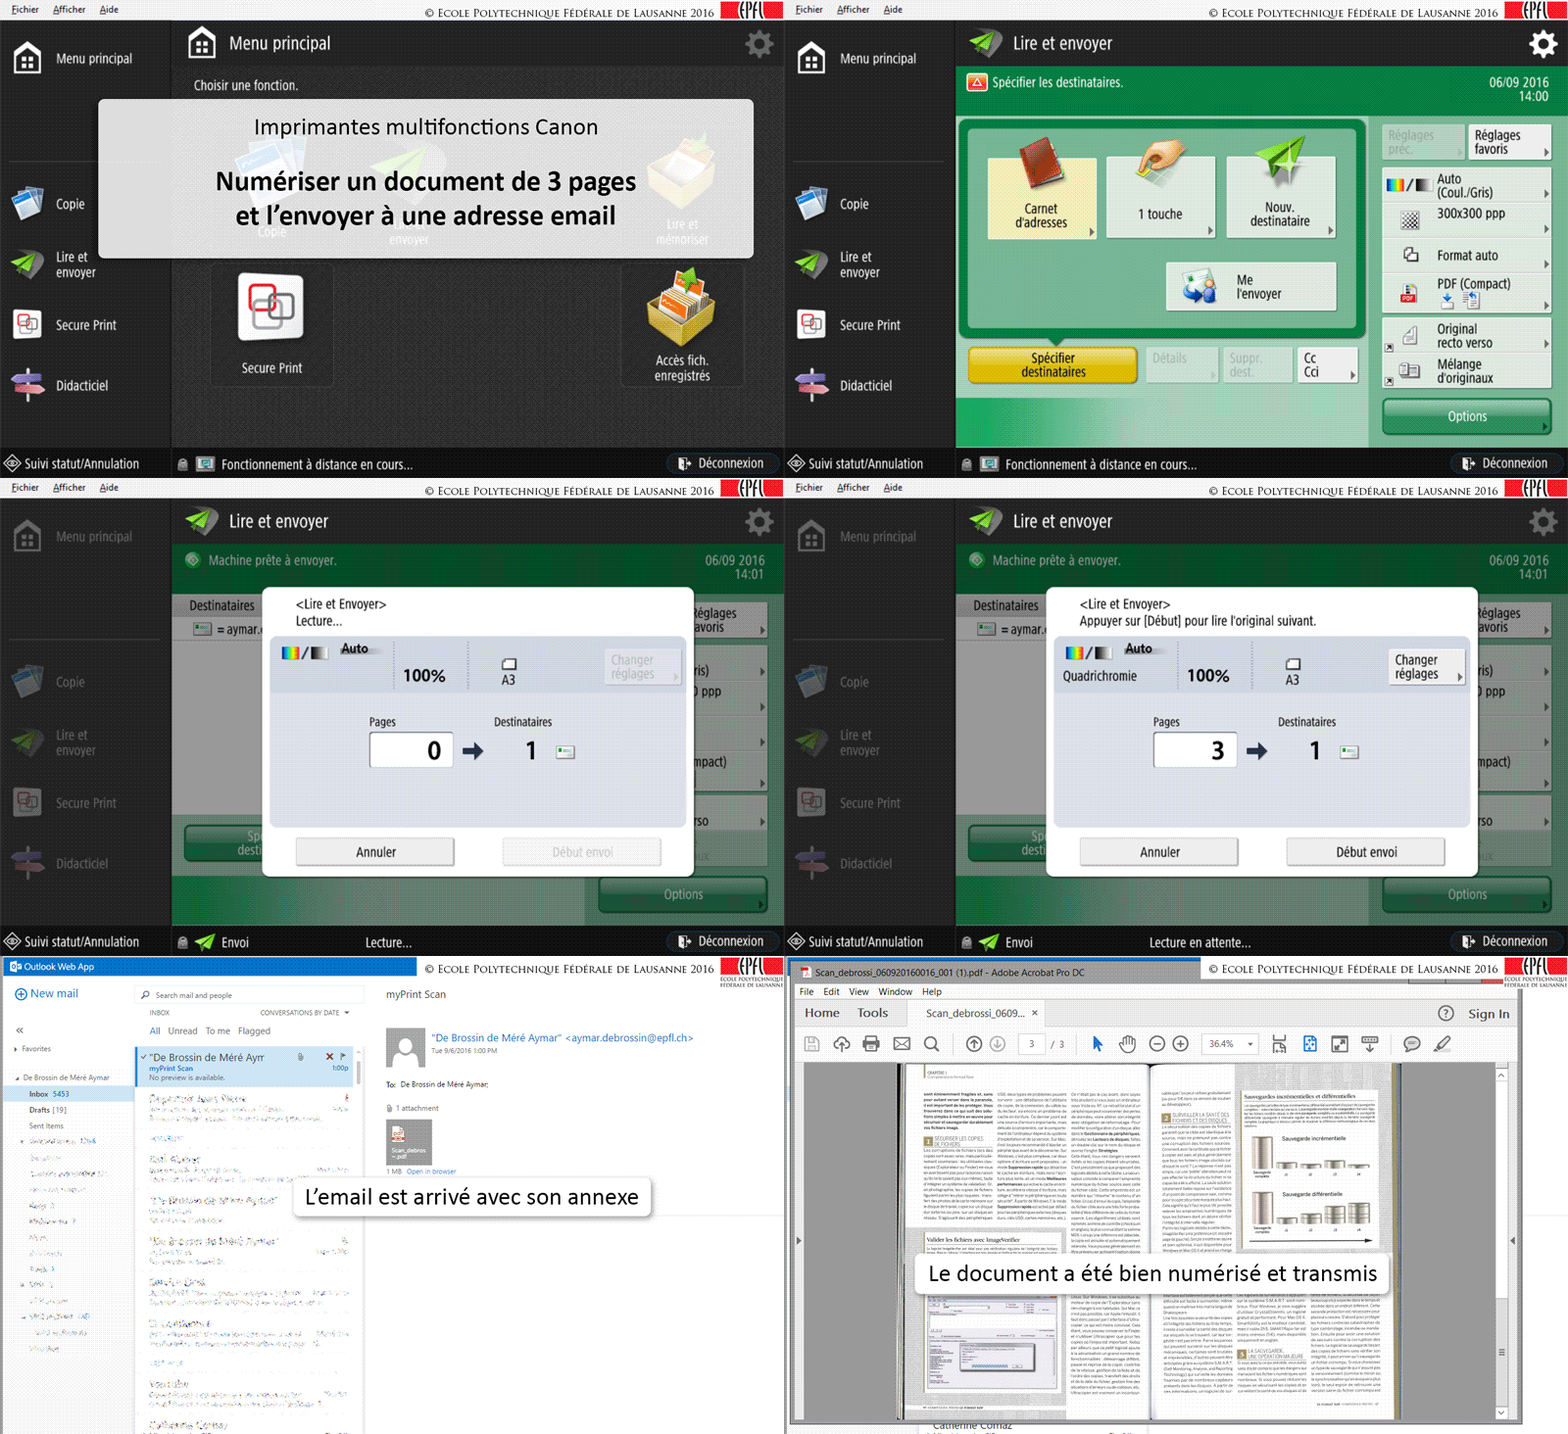
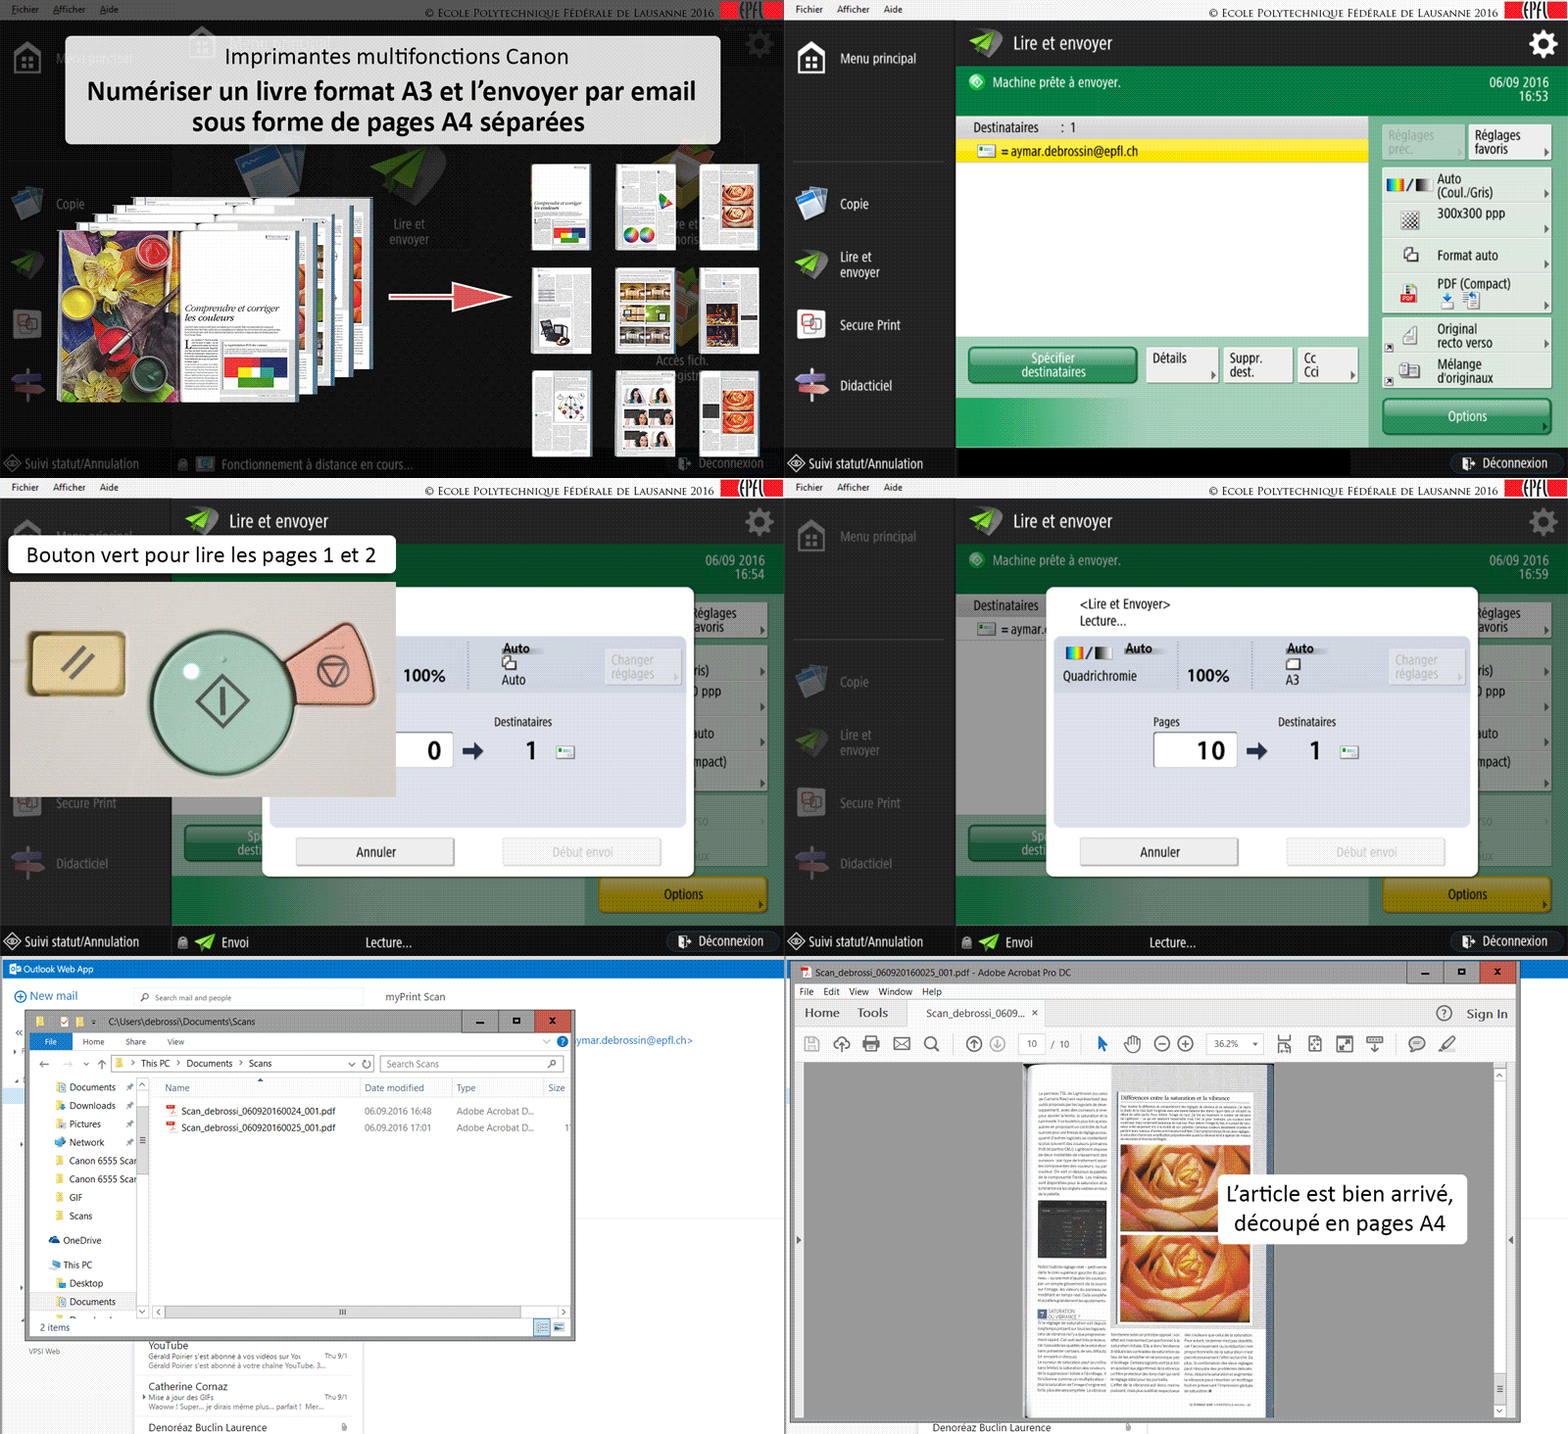
On MFP Canon printers, it is possible to create multipages documents when scanning. Here are two GIFs that explains these possibilities.
GIF tutorial : scan a 3 pages document and send it by e-mail (french)

GIF tutorial : scan an A3 book and send separated A4 pages (french)
