Step 1: download and install the driver
For PCL print queue
- SecurePrintPCL-Col : to print in Color, in PCL format (smaller file size); ideal for “Office” documents (Word, Excel, PowerPoint, etc.)
- SecurePrintPCL-BW : to print in Black and White, in PCL format (smaller file size); ideal for “Office” documents (Word, Excel, PowerPoint, etc.)
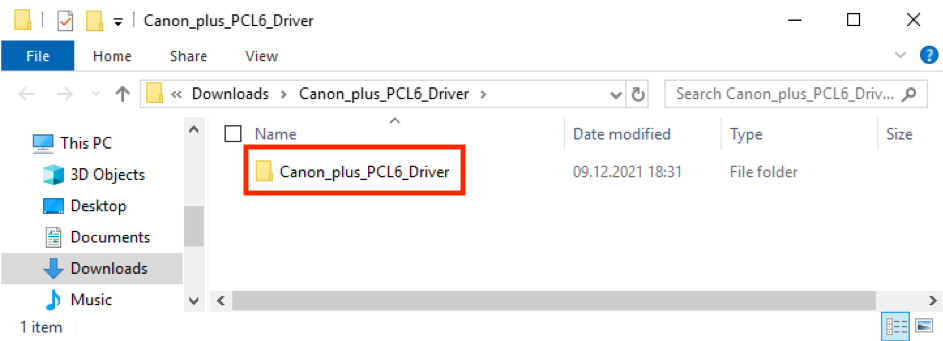
Download ZIP file containing the PCL driver
>>> Canon Plus PCL6 Driver <<<<<
Extract information from Zip file by double clicking on it
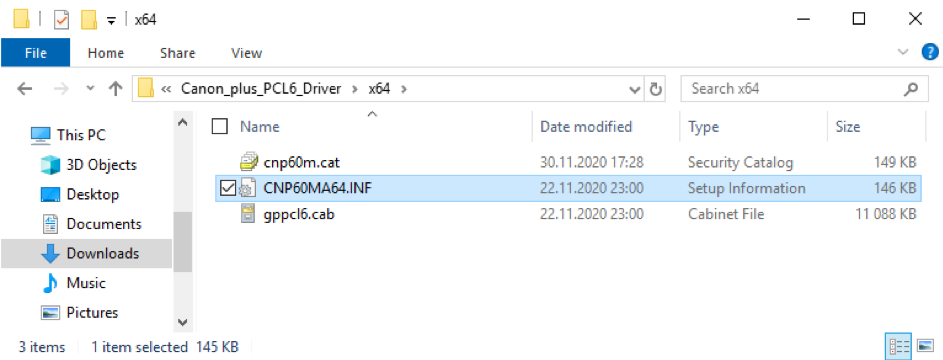
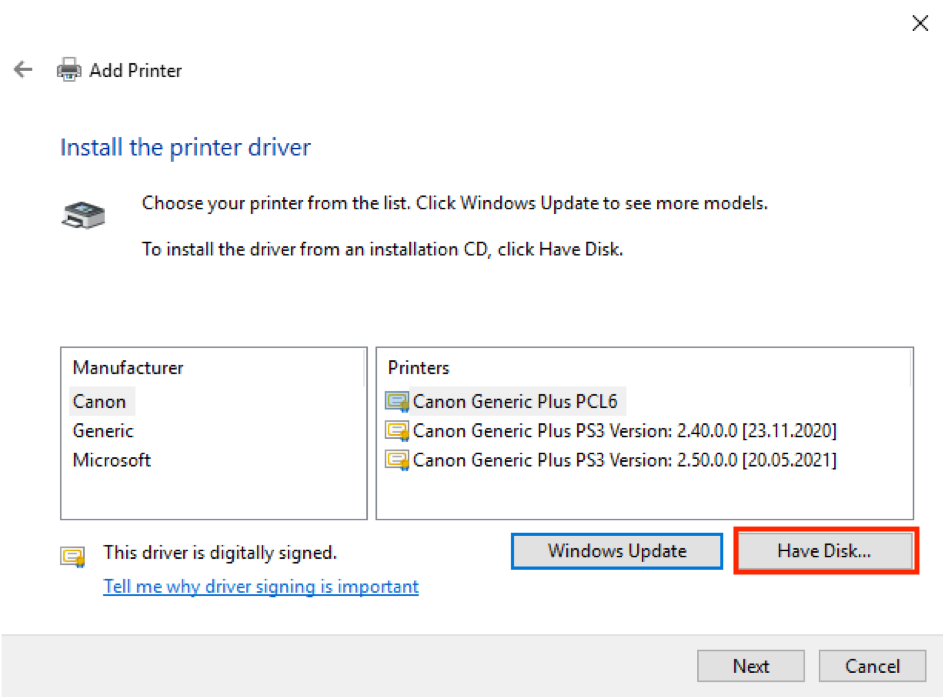
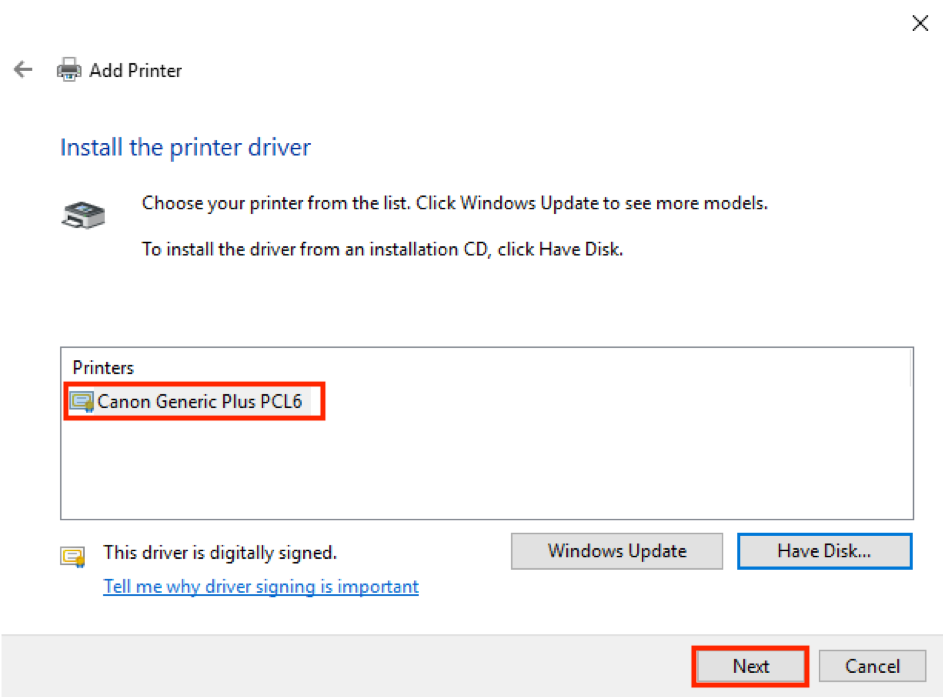
Use right click button on CNP60MA64.INF file to install driver with “install“
Step 2: Install manually a print queue

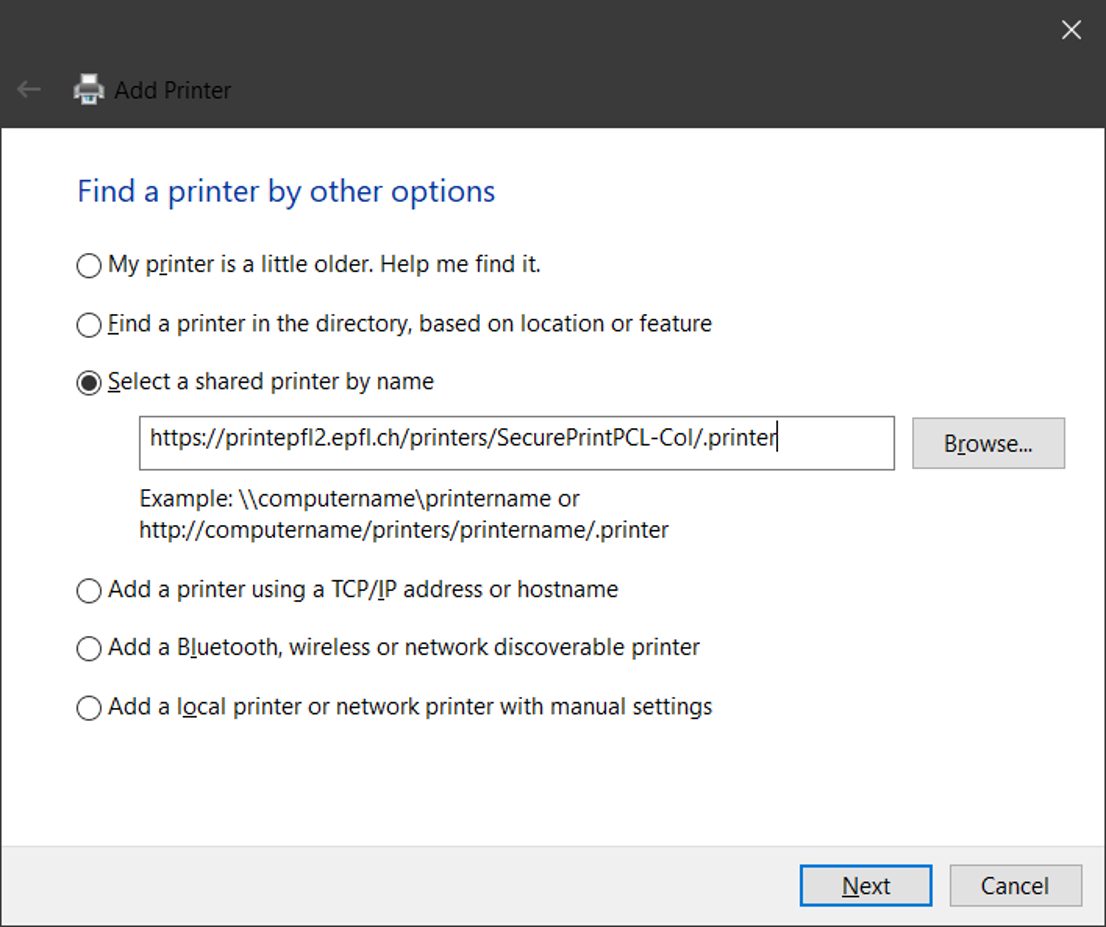
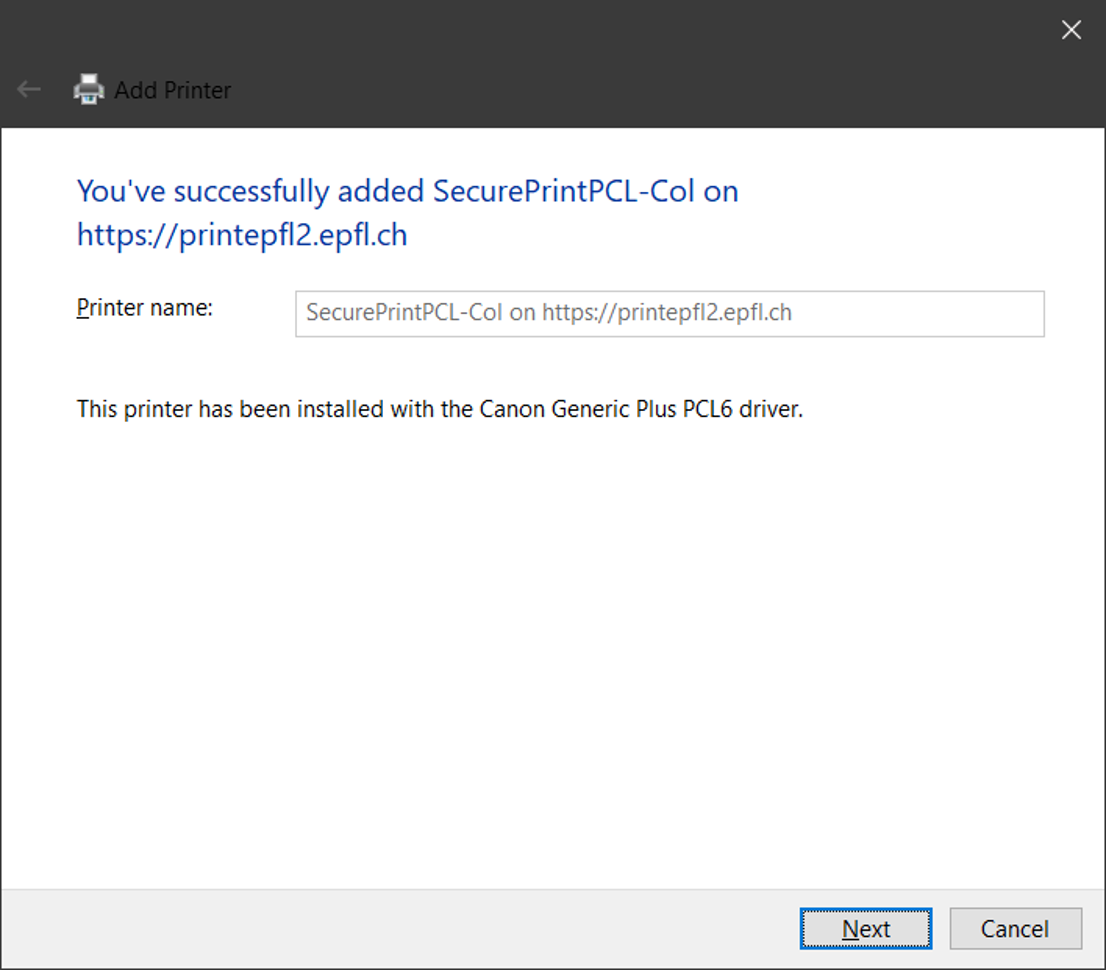
For a “Color” print queue, enter one of those names
- https://PrintEPFL1.epfl.ch/printers/SecurePrintPCL-Col/.printer
- https://PrintEPFL2.epfl.ch/printers/SecurePrintPCL-Col/.printer
- https://PrintEPFL4.epfl.ch/printers/SecurePrintPCL-Col/.printer
- https://PrintEPFL5.epfl.ch/printers/SecurePrintPCL-Col/.printer
For a “Black and White” print queue, enter one of those names
- https://PrintEPFL1.epfl.ch/printers/SecurePrintPCL-BW/.printer
- https://PrintEPFL2.epfl.ch/printers/SecurePrintPCL-BW/.printer
- https://PrintEPFL4.epfl.ch/printers/SecurePrintPCL-BW/.printer
- https://PrintEPFL5.epfl.ch/printers/SecurePrintPCL-BW/.printer
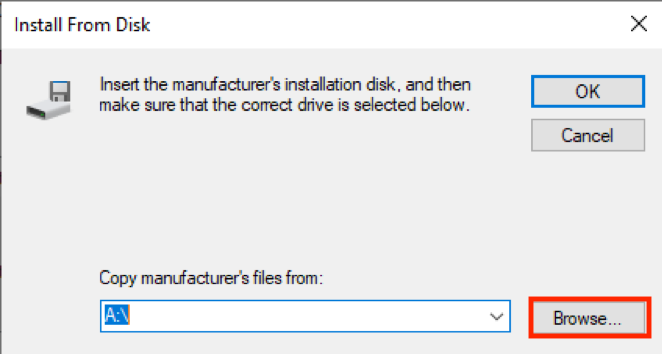
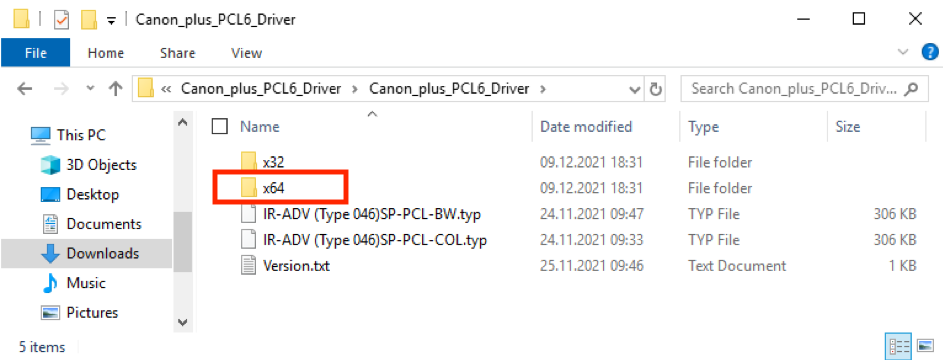
Go to ZIP extraction under:
\Canon_plus_PCL6_Driver\Canon_plus_PCL6_Driver\x64
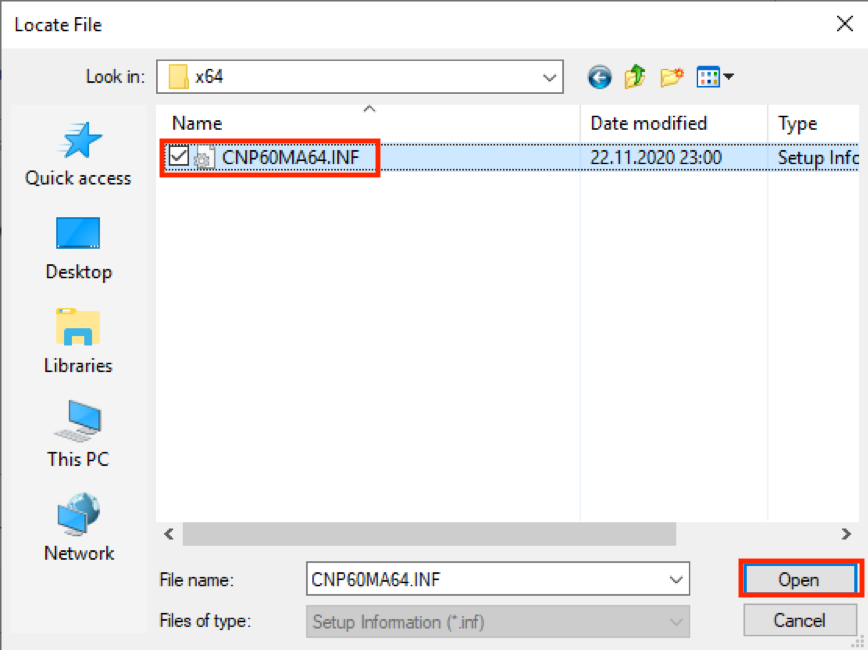
Click on CNP60MA64.INF
Click on End
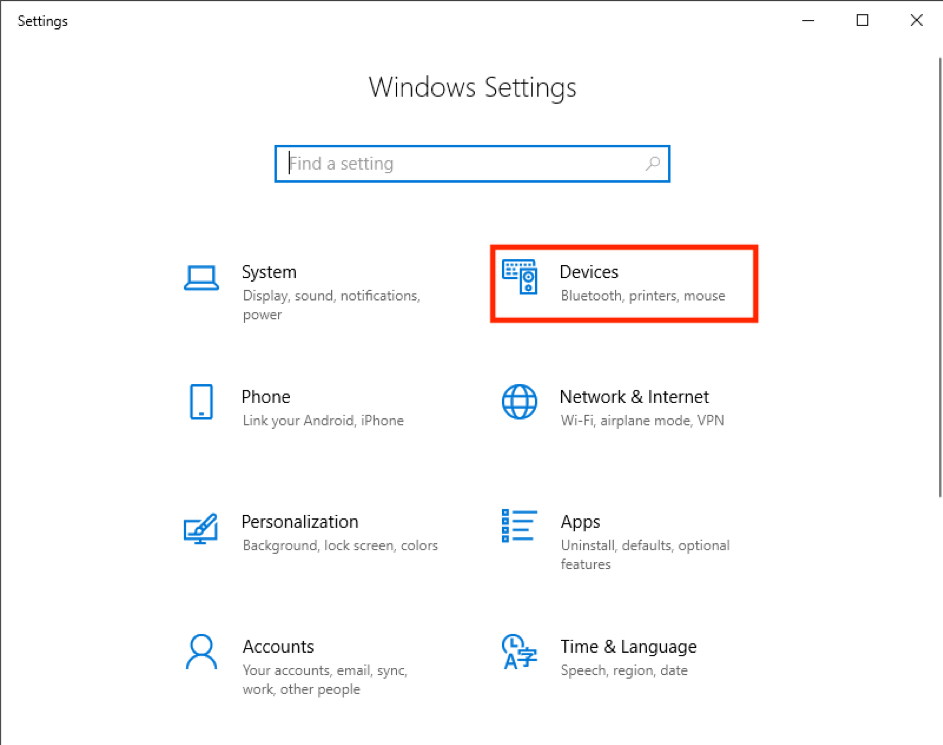
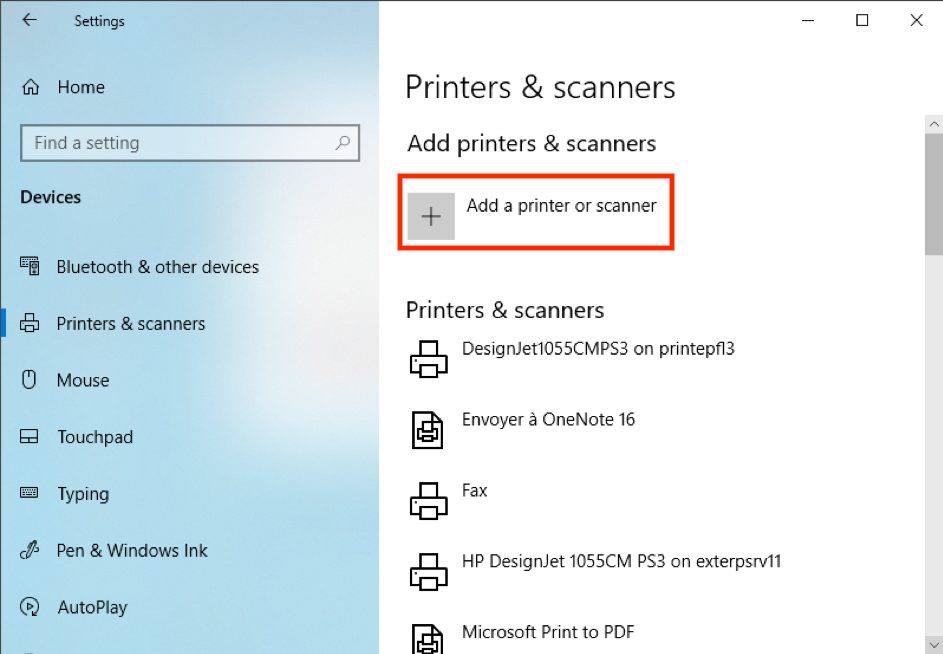
Return to the Devices, Printers and Scanners page
Select your printer
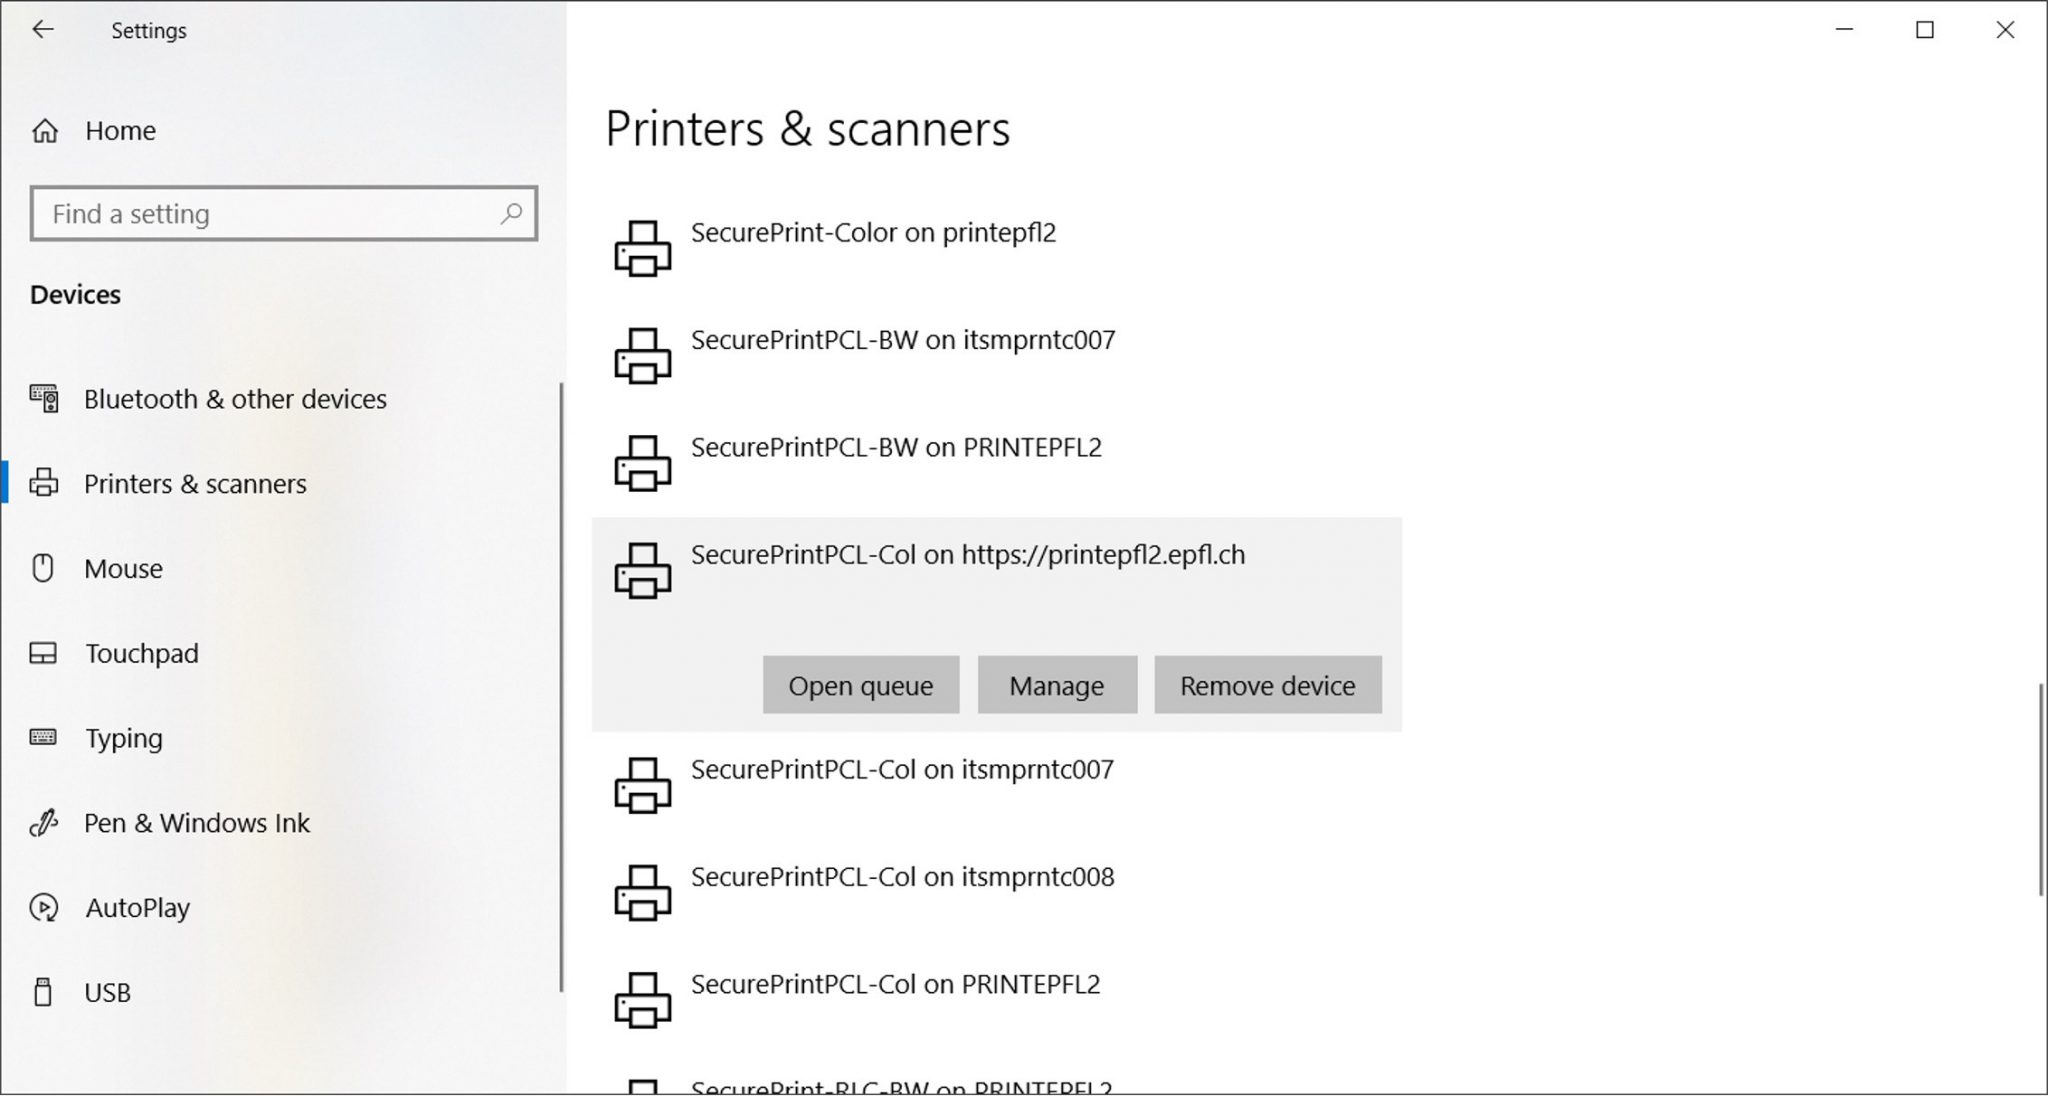
Click on Manage
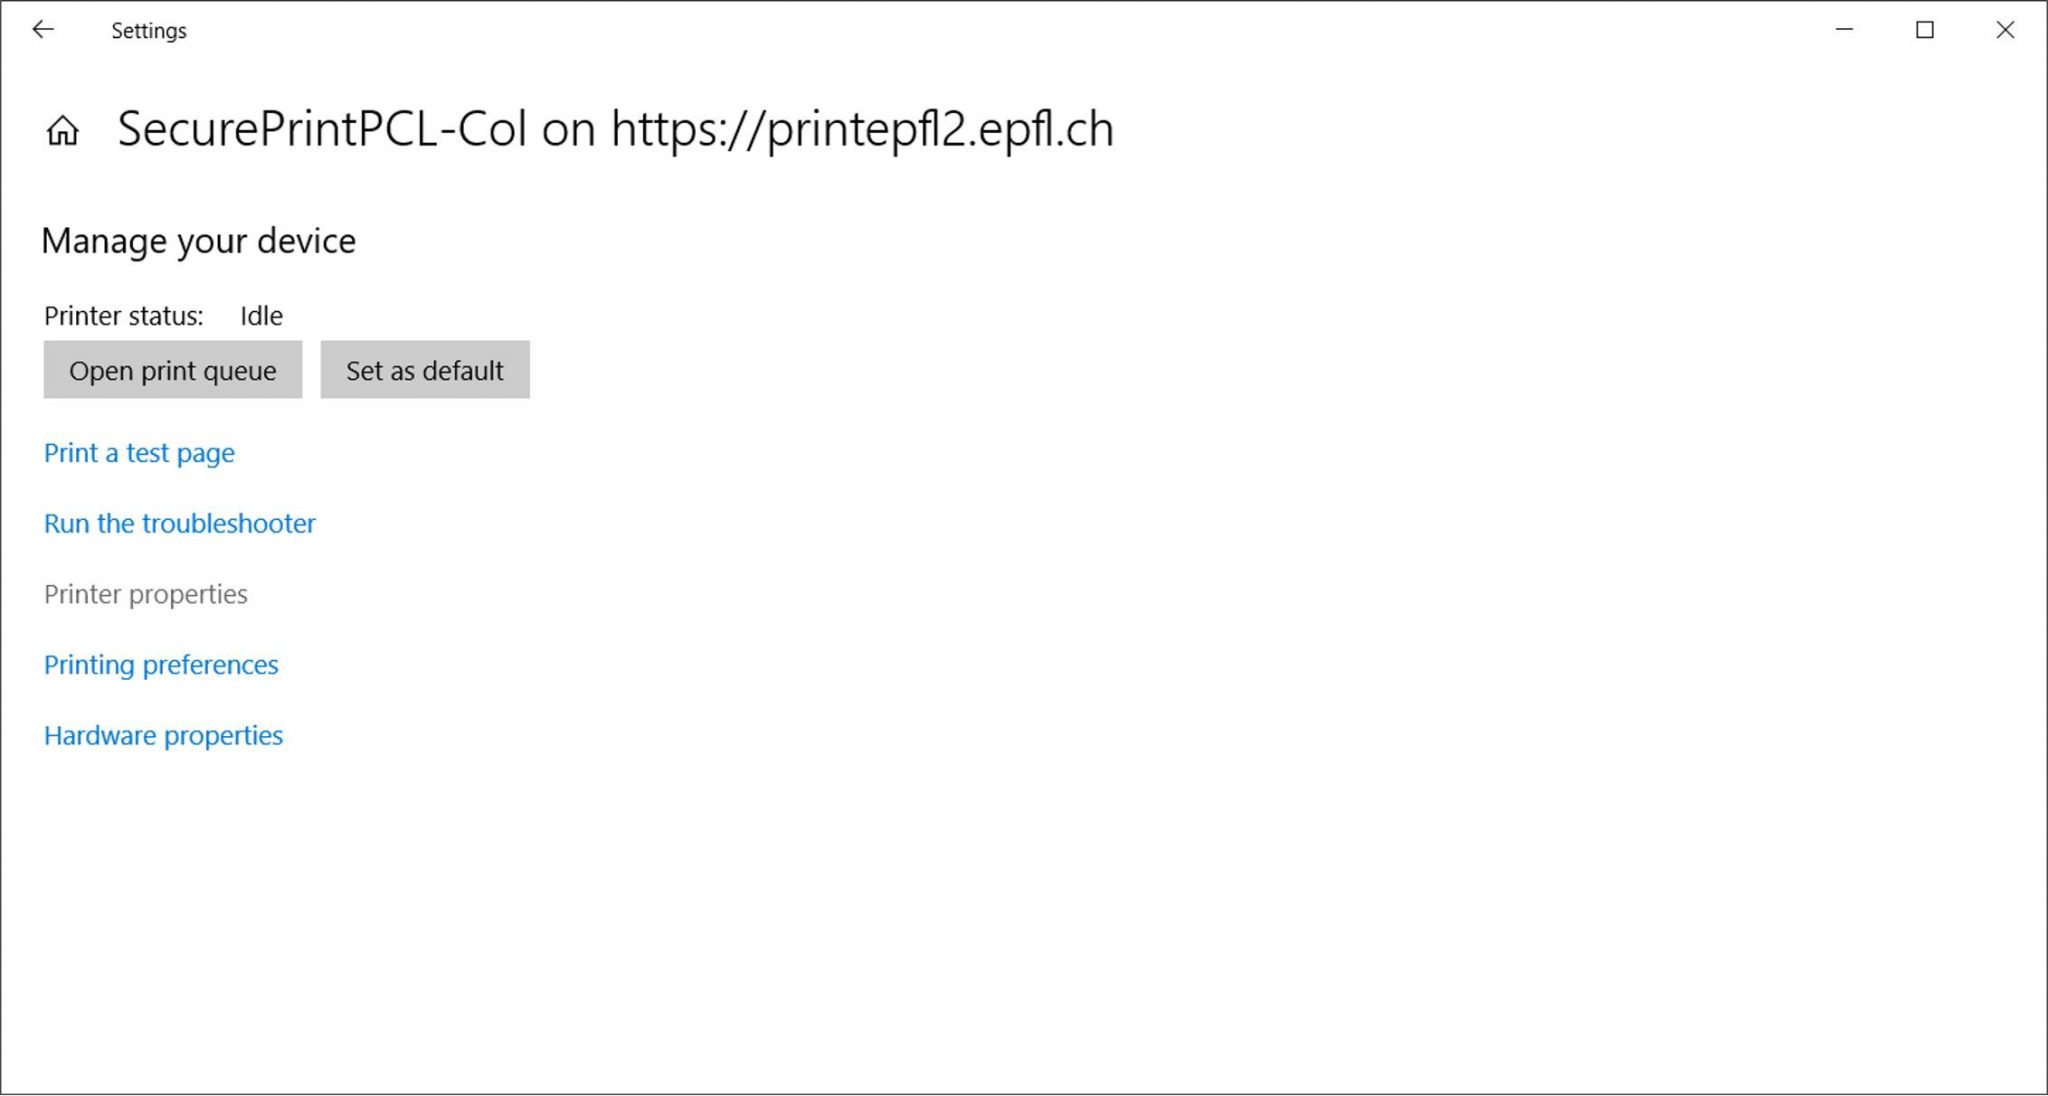
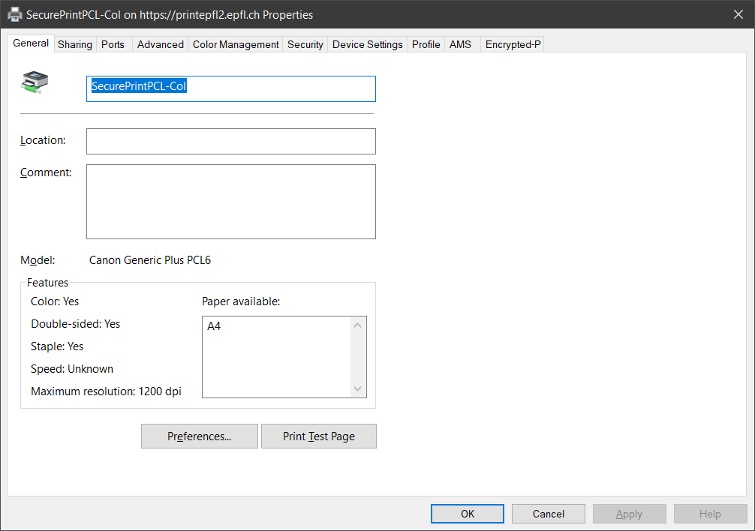
Click on Printer Properties
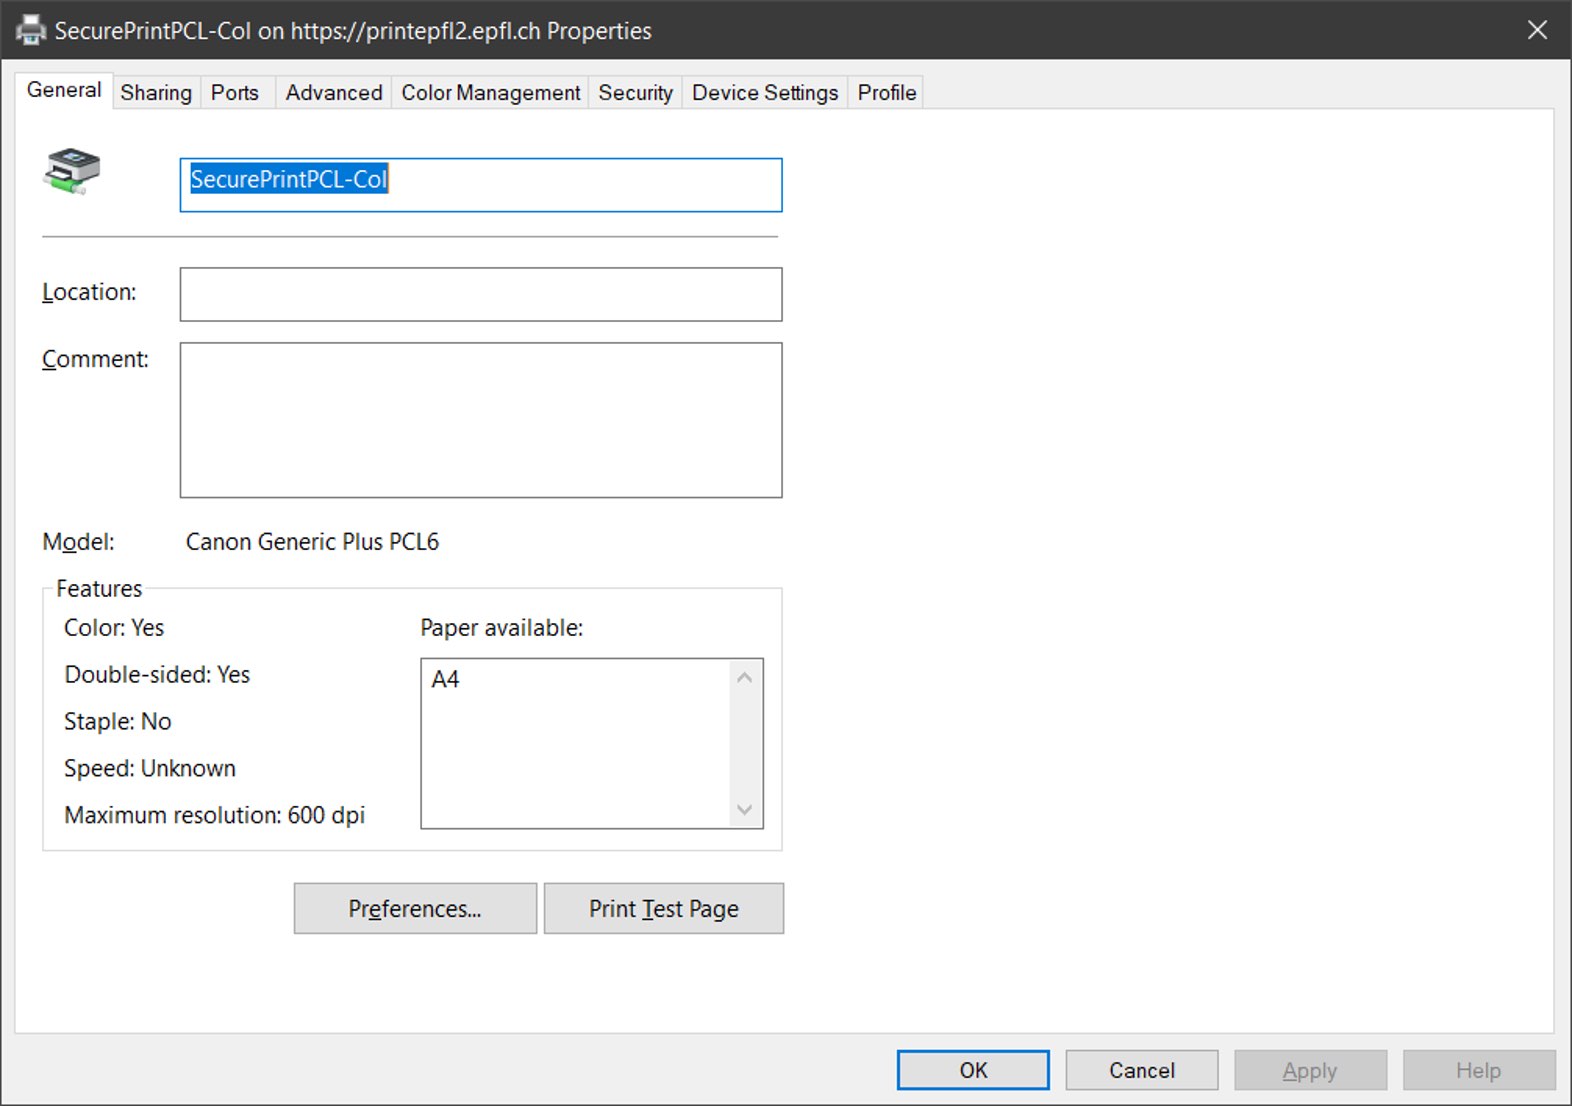
Choose the Device Settings tab
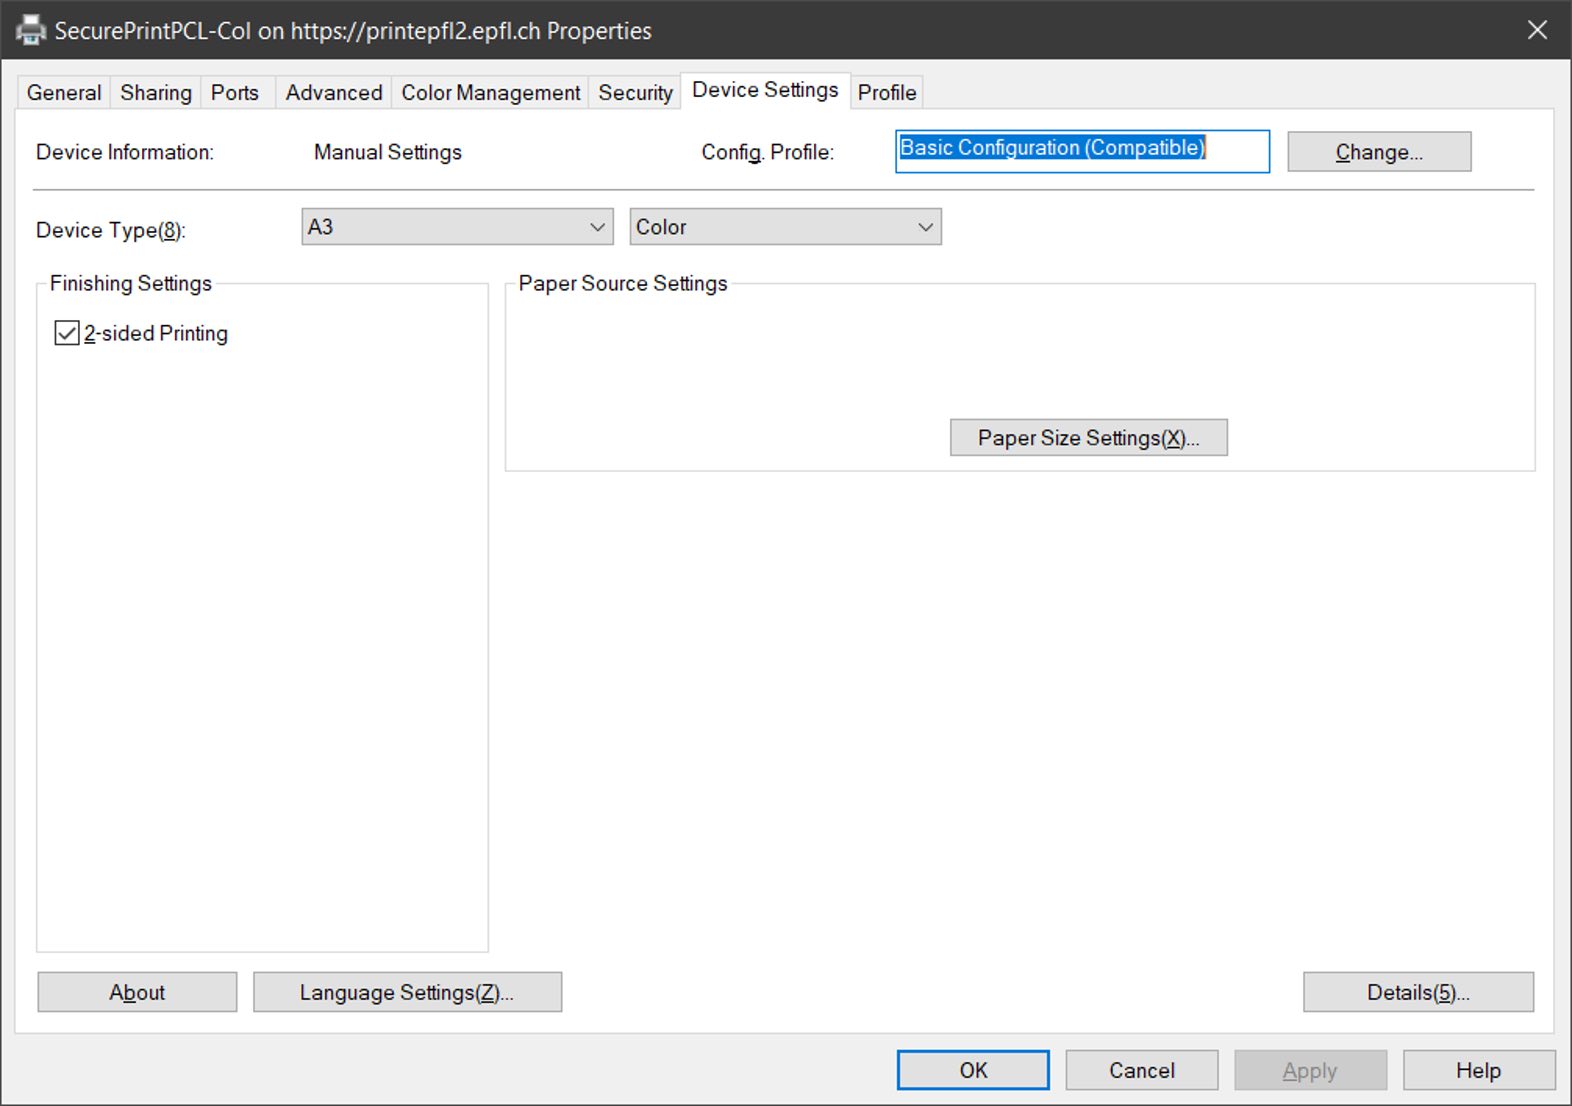
Click on Change
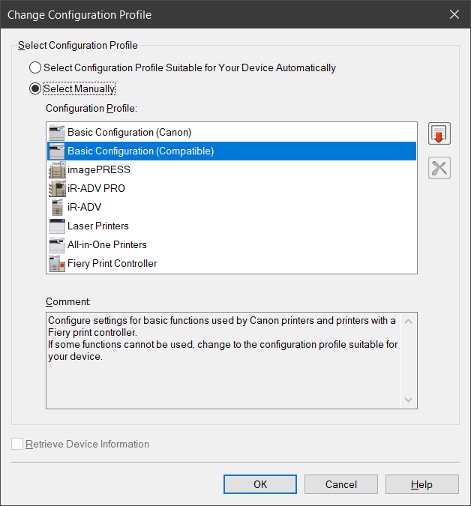
Choose Select manually then on the red arrow visible on the right
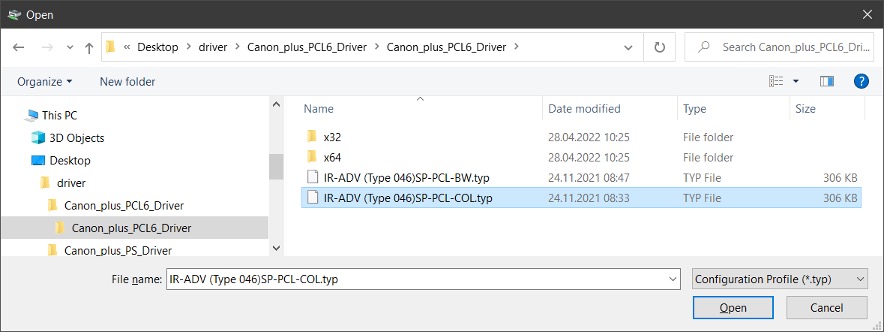
Choose the previously installed driver

Uncheck “Retrieve device information”
Then click “OK”
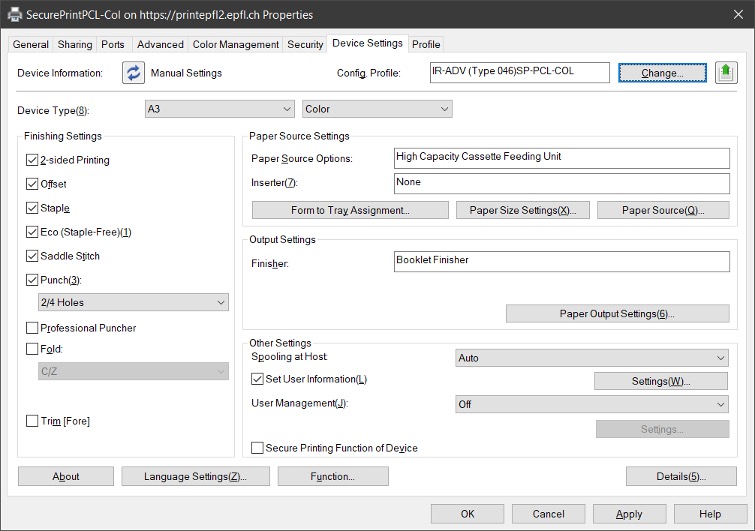
Click Apply and then “OK“
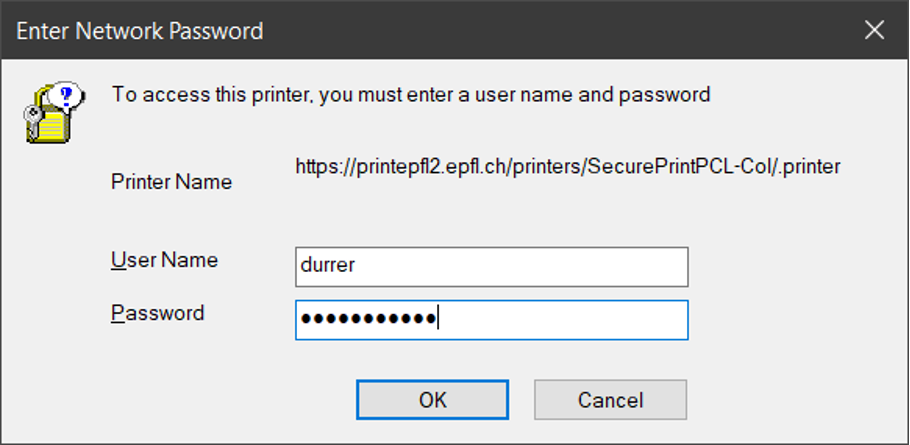
Optional step 4: In case of Gaspar password change
Choose Printer Properties
Choose the Port tab
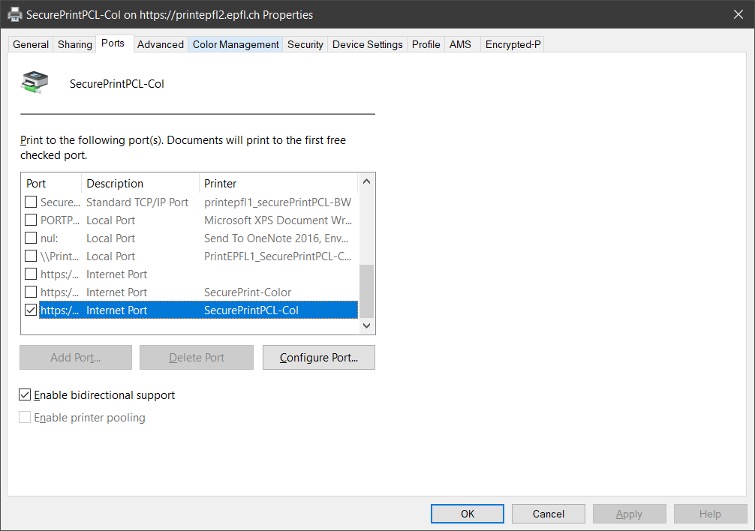
Then Configure Port
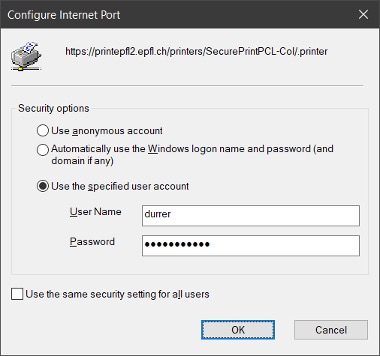
Enter your Gaspar username and password and accept with OK
For a PS print queue
- SecurePrint-Color : to print in Color; larger size but ideal for PDF documents, for example
- SecurePrint-BW : to print in Black and White; larger size but ideal for PDF documents, for example
to print in Color; larger size but ideal for PDF documents, for example,
>>>> Canon Plus PS Driver <<<<<<<
then proceed in the same way, choosing a PS file