Online interactive textbooks with Jupyter Notebooks

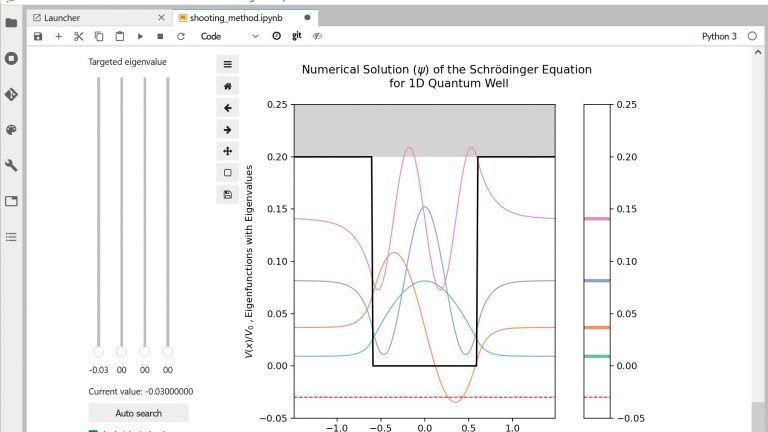
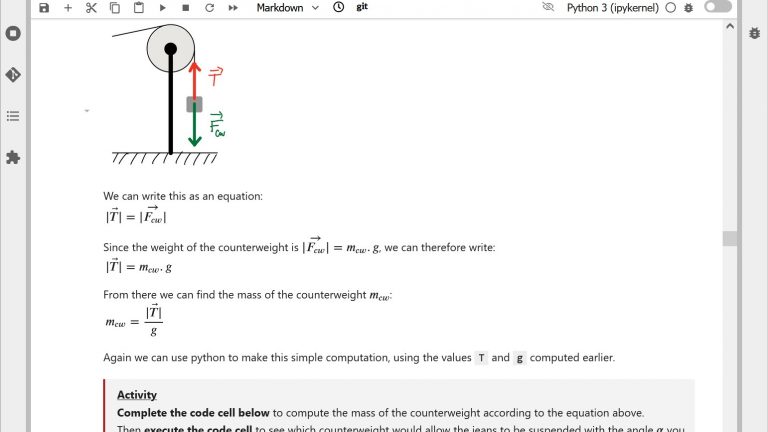
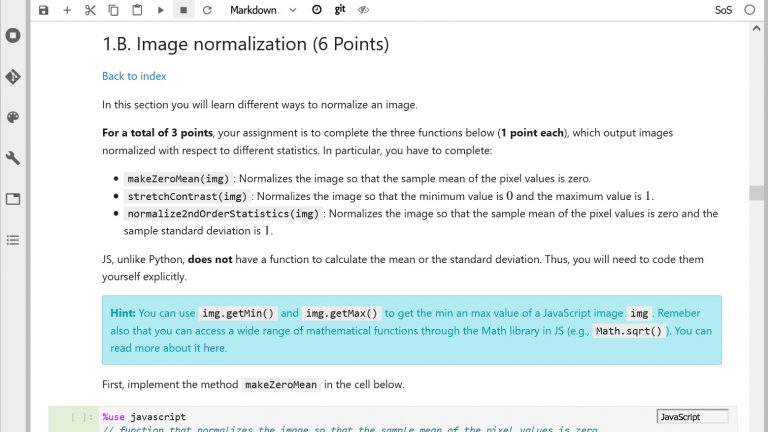
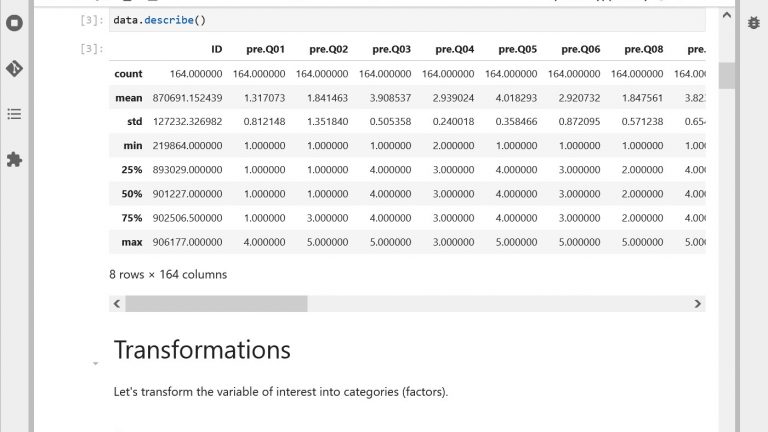
Example of online interactive textbook with Jupyter Notebooks
While many of the principles for designing classic textbooks also apply to notebook-based textbooks, notebooks have specific features that require some adaptation. In this page, we share:
- 4 tips to design the text in your notebook-based textbook
- Ideas on how to use the code in your textbook
- Advice about the use of interactive visualizations
- Suggestions of learning activities to integrate into your textbook
- Options to distribute your notebook-based textbook to your students
Paolo Prandoni explains how he designed an interactive textbook with Jupyter Notebooks for his signal processing course
4 tips to design the text in your notebook-based textbook
The text is a central component in a notebook-based textbook, just as in a classic textbook: it conveys your thinking to students. We share with you 4 tips to design your text effectively based on principles from education research.
As in classic textbooks, techniques such as storytelling can foster students’ interest and motivation to read as well as support memorization. The great feature that notebooks bring to storytelling is the ability to use data as a basis for building engaging narrative. Paolo Prandoni, for example, uses stories around music-related topics such as the PacMan video game one-bit music in his signal processing textbook to teach how to generate sound digitally (learn more here)
Whether based on empirical data (e.g. public datasets), computer-generated data or digital media, stories including worked examples are valuable because they can model for students how you, an expert from the field, solve problems in your discipline. Effective worked examples detail how you analyze the problem, articulate your thinking behind the choice of a methodology and spell out the involved resolution steps including how you check your work.
A drawback of stories is that it might not always be easy for students to identify what they should retain from it. This is why we advise you to tell students what you want them to learn from the beginning by including explicit learning goals at the start of your notebooks.
It is even better if you can provide students with a way to check whether they have reached these goals at the end of your notebook, using interactive questions with feedback for instance (see our section on learning activities below). Indeed, research shows that making success criteria clear to students is among the most effective teaching strategies (J. A. C. Hattie & Donoghue, 2016).
When writing your text, keep in mind that its length can quickly become an issue. Our cognitive system is limited in the amount of new information it can process simultaneously (Miller, 1994). In addition, a lengthy text in a notebook quickly requires students to scroll too much, which makes navigation difficult and can generate confusion.
Therefore you should keep your explanation short, both in terms of length and in terms of the number of concepts introduced. We recommend splitting long texts into separate notebooks: with hyperlinks, students can navigate easily from one notebook to another and you can also build an entry notebook with an overall table of content of your textbook, where you can organize your notebooks into logical units / chapters. To create hyperlinks between notebooks using the Markdown syntax, simply replace the URL by the relative path to your notebook instead, as follows: [text of your link](./relative/path/to/notebook.ipynb)
Another specific issue with the text in notebooks is that it can become cluttered very quickly. As in classic textbooks, an efficient way to help students find their way into your content is to highlight important points and to structure your text with explanatory titles. See this cheatsheet or the full reference of the Markdown syntax for standard typesetting features such as emphasis or titling. Visual separators such as blank lines or horizontal rules (see here how to generate them in Markdown) can also help you lighten and tidy your text.
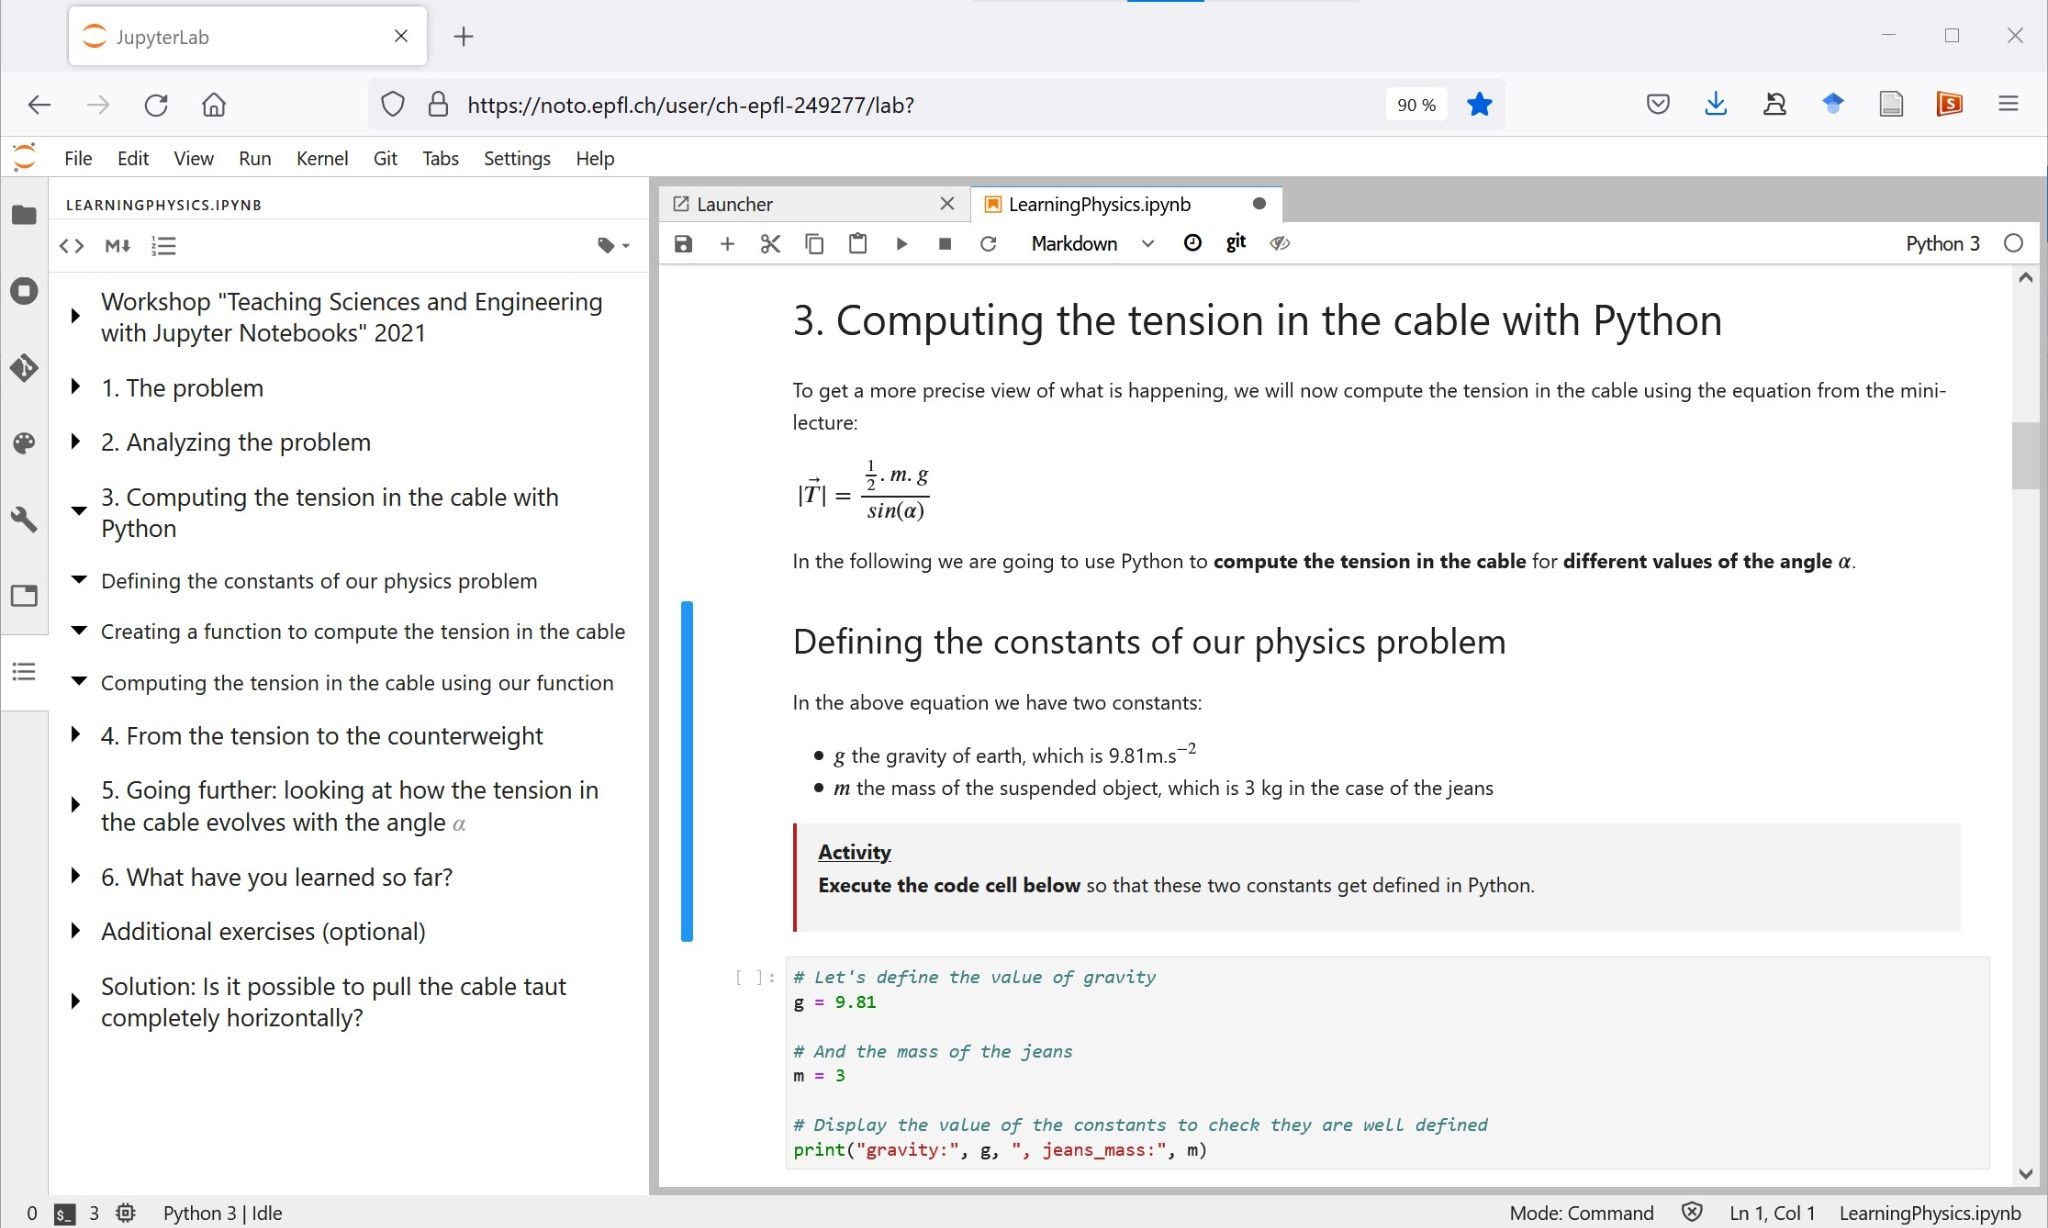
Because our long term memory is associative by nature, providing an explicit structure that helps students see how different parts relate to each other is likely to help them understand and memorize your content. In addition, overall maps showing the structure of your notebook in a synthetic way can prove very helpful. Don’t hesitate to integrate overview diagrams or concept maps into your notebooks (you can find examples and advice on using concept maps here). Did you know that JupyterLab offers a “table of content” view in the left navigation pane based on the titles you use in your notebook? It can be accessed using the left vertical toolbar (see the figure below) – don’t hesitate to show it to your students!
How could the code be used into your textbook?
The ability to include executable code directly and easily in your text is THE feature that makes Jupyter Notebooks so brilliant for designing online interactive textbooks. But how can it support student learning? In the following, we distinguish two different types of situations depending on whether you teach programming-related topics or not.
Obviously, being able to embed executable code into your textbook is particularly useful if you teach programming-related topics or if you want to introduce your students to computational thinking. First, it allows you to explain your code in a seamless way with more readable explanations than with standard code comments. This can, in turn, help your students read your code and better understand it, a step shown to be essential when learning to program.
Second, the Read-Eval-Print-Loop (REPL) pattern that notebooks implement allows students to easily “tinker” with the code, thus supporting exploratory problem solving and active learning by design. Recent studies have shown that using notebook-based textbooks to teach programming is indeed quite effective, in particular when the textbook includes worked examples and practice problem sets.
On the other hand, you should keep in mind that Jupyter notebooks are not really designed for software development and also have some drawbacks as a programming environment. In particular, their hidden execution state (although this has improved with the integrated debugger in JupyterLab 3) and the segmentation of the code into multiple cells which require a certain execution order can generate issues for novice programmers. You should therefore ponder whether notebooks are the right support for your course.
But even when you are not teaching programming, you can use notebook code cells to embed helpful interactive illustrations into your textbook.
For example, let’s say that you would like to teach students the notion of sampling distribution of the mean. A relatively simple piece of Python code can easily simulate a situation where you draw X number of random samples and build the histogram of the sample means. With sufficiently high values for X, students would then be able to observe the shape of the sampling distribution and see the mean of sample means converge towards the population mean.
We share with you principles to design effective interactive visualizations on this page. Notebooks being interactive by design, you don’t necessarily need to implement such a visualization with widgets. In the example above, students could simply change the value of X directly in the code and re-execute the cell to see the result.
Should you keep the code of interactive visualizations visible in your textbook?
With code-generated illustrations comes the question of keeping visible or not the code that generates them in your textbook. While the literate computing philosophy behind notebooks is clearly meant to show the code and avoid the black box effect, your decision in this respect should be guided by your learning objectives. Would seeing the code help students to learn something important? You should also take into account the programming background of your students: how much difficulty would seeing this code generate for them?
If your choice is to hide the code, you may find edition and publication workflows such as Jupyter Book or Voilà helpful since they offer options to automatically hide code-cells (actually, Voilà automatically strips away all code cells by default).
If your choice is to let the code visible, below is some practical advice so that it results in a useful learning experience for your students.
Use explicit variable names, space out and indent your code, add comments – i.e. make sure to use the best programming practices. Not only will that make things easier for your students, but it will also model good practices for them to learn.
Some parts of your code may not bring anything useful to students (e.g. boilerplate code) or be unnecessarily complex or verbose (e.g. code that generates or customizes your graphical visualizations). You can use the standard import mechanism in Python to move this type of code into a separate file. Learn more in our documentation.
Research indicates that students often have difficulties translating between different representations of the same thing, such as between a mathematical equation and a Python function for instance. Therefore it is important to make sure that the correspondence will be clear enough, even if that proves tricky in particular with mathematical notations (xi, xi, ẏ, ϕ, etc.). For instance, a variable called v’ in your equation could be named v_prime in your code.
Integrating learning activities into your textbook
Research clearly shows that active learning methodologies are highly effective. One could argue that reading is active learning, but the truth is we all have experienced one day or another reading something and not remembering anything about it later (sometimes even a few hours after). Integrating learning activities along the way in your textbook can really keep your students engaged in their reading and support their understanding of your material.
Thanks to embedded executable code, there is nothing easier than to include interesting learning activities into your notebook-based textbook. The most useful types of activities are those that a) focus on the most important concepts to learn and b) allow students to get feedback on their learning. But what type of activities can you use and where to integrate them?
Here are three different ways in which activities can help your students depending on where you integrate them into your notebook-based textbook:
- At the beginning of a notebook, an activity can help students recall the prior knowledge on which your notebook will build;
- After a section introducing new concepts, an activity serve as an intermediate checkpoint to detect misunderstandings before going further;
- At the end of a notebook, an activity is a way for students to start applying what they have just learned, which will foster their long term memorization.
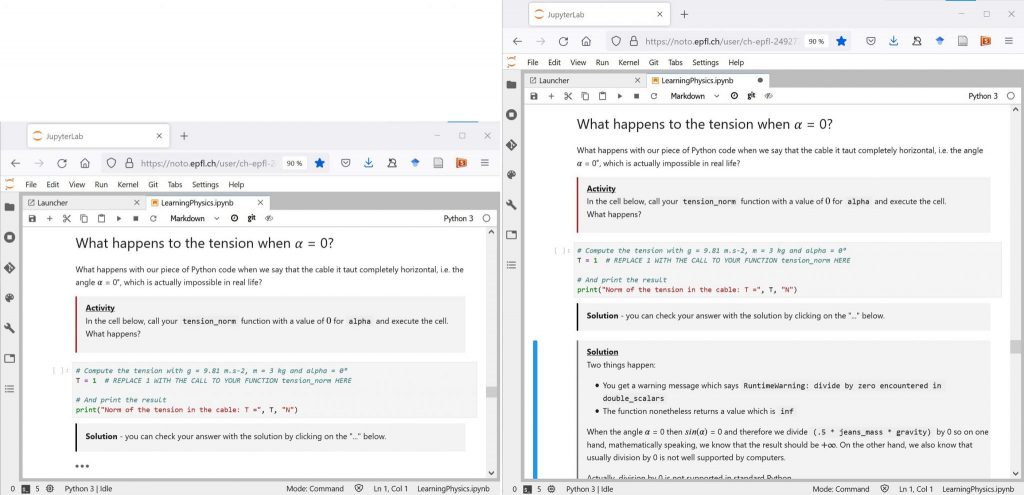
If you are teaching programming-related topics, activities such as predicting the output of a piece of code before executing it, or completing or modifying a program have been shown to be particularly beneficial for novice programmers. You can provide solutions in the form of hidden cells, as illustrated on the figure below, or in a separate notebook (this latter option may simplify your notebook production workflow, which can also be partly automated). Learn more on our page about interactive exercises with notebooks.
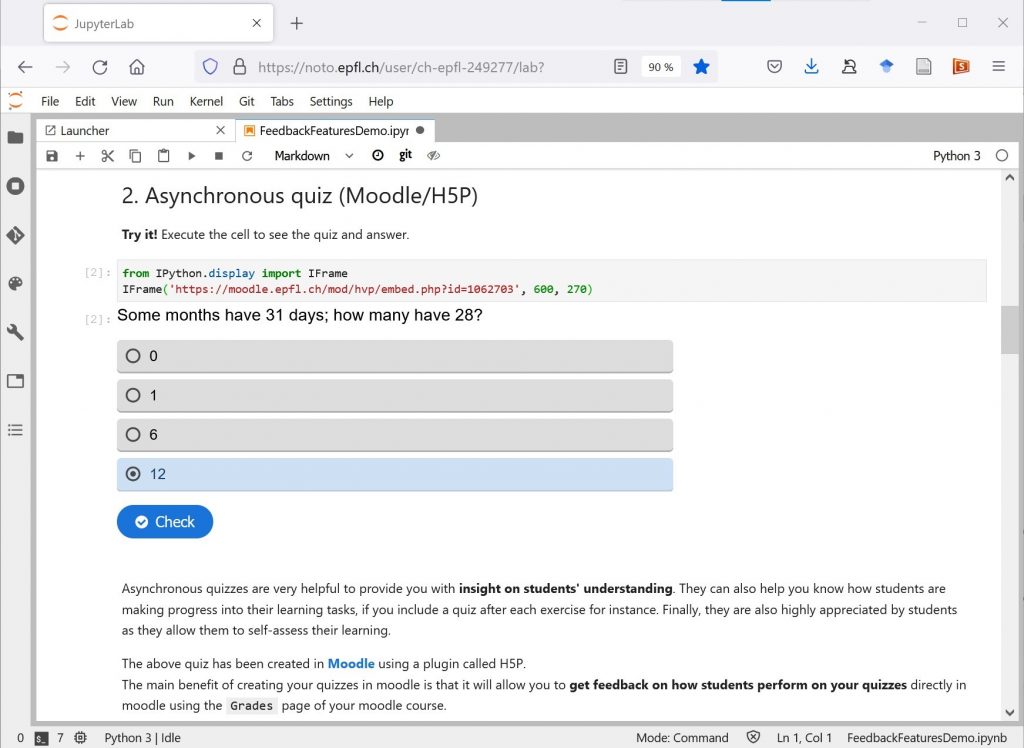
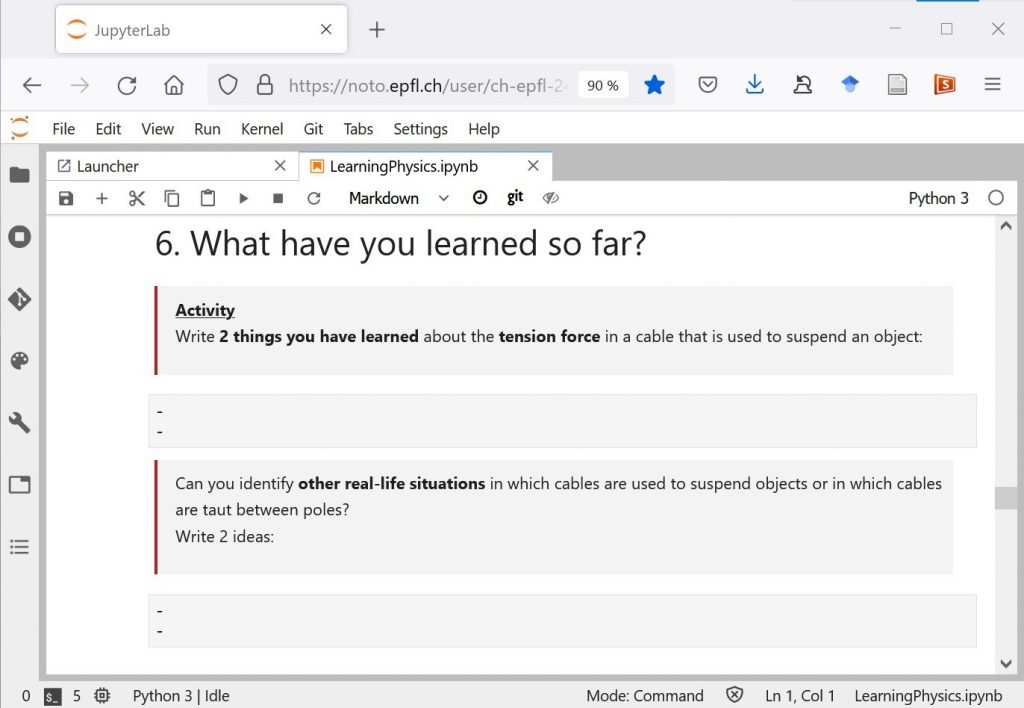
For other types of topics, interactive quizzes such as with H5P make very helpful learning checkpoints. To learn how to integrate H5P quizzes into your notebooks on noto, check out our documentation here. A “low tech” version consists in asking questions in your text and including empty raw cells to encourage students to answer for themselves as illustrated by the figure below. To provide them with feedback in this case, you could simply include corresponding solutions.
Wondering if your notebook is well designed? Self-assess your notebook using our rubric!
How to distribute your notebook-based interactive textbook?
Once you have designed your notebook-based interactive textbook, you probably wonder how to distribute it to students. To fully benefit from the pedagogical features of notebooks introduced above, we advise you to share your textbook in executable form so that students can easily interact with your code-based illustrations and activities and tinker with the code, as is natural in the notebook paradigm.
To spare your students installing Jupyter on their computer, you can use noto, EPFL’s fully featured JupyterLab environment (read more here). Other publicly available options are third party Jupyter platforms such as Binder or Google Colab, but with a number of limitations. An alternative is to convert your notebooks to a static format such as PDF or HTML. Jupyter Book offers a mixed approach combining a static HTML version of your textbook with links to an executable version of the notebooks on the platform of your choice.
Independently from the execution platform, the most convenient method to distribute your textbook is usually to host it in a git repository, from which you can easily generate links to share with your students. If you would like your students to execute your textbook on noto, follow the instructions in our documentation on how to use git and how to generate shareable links with nbgitpuller.
Author: Cécile Hardebolle
Other resources
Discover other ways of using Jupyter Notebooks in your teaching
Bibliography
Ainsworth, S. (2014). The Multiple Representation Principle in Multimedia Learning. In R. E. Mayer (Ed.), The Cambridge Handbook of Multimedia Learning (2nd ed., pp. 464–486). Cambridge University Press. https://doi.org/10.1017/CBO9781139547369.024
Alterio, M., & McDrury, J. (2003). Learning Through Storytelling in Higher Education: Using Reflection and Experience to Improve Learning. Routledge. https://doi.org/10.4324/9780203416655
Freeman, S., Eddy, S. L., McDonough, M., Smith, M. K., Okoroafor, N., Jordt, H., & Wenderoth, M. P. (2014). Active learning increases student performance in science, engineering, and mathematics. Proceedings of the National Academy of Sciences, 111(23), 8410–8415. https://doi.org/10.1073/pnas.1319030111
Granger, B. E., & Pérez, F. (2021). Jupyter: Thinking and Storytelling With Code and Data. Computing in Science Engineering, 23(2), 7–14. https://doi.org/10.1109/MCSE.2021.3059263
Hattie, J. (2009). Visible learning: A synthesis of over 800 meta-analyses relating to achievement. Routledge.
Hattie, J. A. C., & Donoghue, G. M. (2016). Learning strategies: A synthesis and conceptual model. Npj Science of Learning, 1(1), 1–13. https://doi.org/10.1038/npjscilearn.2016.13
Miller, G. A. (1994). The magical number seven, plus or minus two: Some limits on our capacity for processing information. Psychological Review, 101(2), 343–352. https://doi.org/10.1037/0033-295X.101.2.343
Novak, J. D. (2005). Results and Implications of a 12-Year Longitudinal Study of Science Concept Learning. Research in Science Education, 35(1), 23–40. https://doi.org/10.1007/s11165-004-3431-4
Robins, A. V. (2019). Novice Programmers and Introductory Programming. In The Cambridge Handbook of Computing Education Research (p. pp 327-376). Cambridge University Press. https://doi.org/10.1017/9781108654555.013
Ruiz-Sarmiento, J.-R., Baltanas, S.-F., & Gonzalez-Jimenez, J. (2021). Jupyter Notebooks in Undergraduate Mobile Robotics Courses: Educational Tool and Case Study. Applied Sciences, 11(3), 917. https://doi.org/10.3390/app11030917
Smith IV, D. H., Hao, Q., Hundhausen, C. D., Jagodzinski, F., Myers-Dean, J., & Jaeger, K. (2021). Towards Modeling Student Engagement with Interactive Computing Textbooks: An Empirical Study. Student Motivation, 7. https://doi.org/10.1145/3408877.3432361
